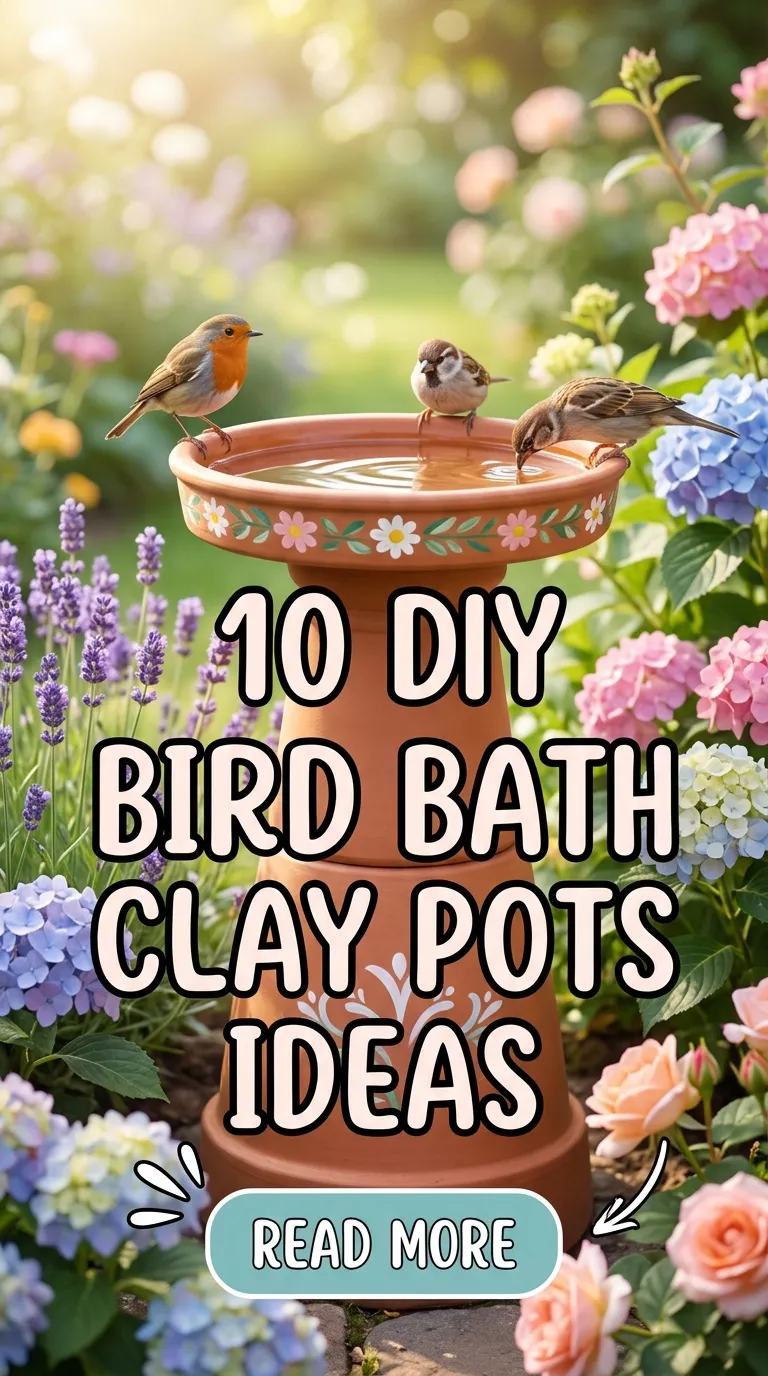

DIY bird bath clay pots ideas continue to grow across Pinterest ideas boards because they combine outdoor decoration, handmade creativity, and practical garden use in one easy project. Clay pots are widely available, affordable, and simple to customize, making them ideal for beginner friendly DIY tutorials. A bird bath made from clay pots can improve garden organization, support local birds, and create a calm outdoor atmosphere while fitting many styles, including rustic, farmhouse, minimalist style, and modern design aesthetics. These projects also work well for patios, balconies, flower gardens, and small outdoor corners where decorative features need to remain compact and functional.
This article explains how to create ten original bird bath concepts using clay pots and simple materials. Each idea includes clear step by step guidance, preparation details, and practical setup methods that can be completed without advanced crafting experience. Readers will learn how to combine stacked pots, saucers, paint finishes, stones, mosaic details, and natural decoration techniques into attractive and useful garden features. The article also covers planning considerations, common beginner mistakes, styling inspiration, budget ideas, and creative expansion methods for more advanced DIY projects. Every section focuses on practical execution while maintaining aesthetic appeal suitable for trending ideas often shared on Pinterest inspiration boards.
Why This Idea Is Trending or Useful
Clay pot bird baths remain popular because they provide a low-cost outdoor creative project that combines home decor with natural garden functionality. Many Pinterest ideas focus on decorative outdoor spaces that feel personalized without requiring expensive landscaping. DIY bird bath projects fit this trend because they allow complete creative freedom while using simple materials that are easy to find. The finished result adds movement, texture, and visual balance to outdoor areas while also supporting birds that naturally help maintain healthy garden environments.
Another reason these projects continue trending is their accessibility for beginners. Most designs require only clay pots, saucers, waterproof adhesive, paint, and basic tools. The construction process is straightforward, making these projects suitable for weekend crafting sessions or seasonal decoration updates. Clay pots also work well with many design styles, including cottage gardens, minimalist style patios, bohemian outdoor spaces, and modern design arrangements. Their neutral texture blends naturally with stone, wood, greenery, and flowers.
Pinterest inspiration often highlights projects that combine organization, decoration, and functionality in one piece. Bird baths meet all three goals because they organize outdoor focal points, decorate empty corners, and provide water access for wildlife. These easy project ideas also encourage handmade creativity through painting, texture layering, mosaic work, and custom color combinations that match different outdoor themes and seasonal decoration plans.
Materials and Preparation
Before starting a DIY bird bath clay pot project, preparing the workspace and gathering materials helps create a smoother and more organized process. Most designs require terracotta clay pots, large saucers, waterproof construction adhesive, outdoor paint, sealant, sandpaper, and protective gloves. Additional materials may include stones, mosaic tiles, marbles, rope, wood pieces, decorative gravel, or small garden ornaments depending on the selected design. Choosing sturdy clay pots without visible cracks improves durability and stability during outdoor use.
Preparation begins with cleaning all clay surfaces thoroughly to remove dust and debris. Washing and drying the pots allows paint and adhesive to bond correctly. Sanding rough edges helps create safer handling and cleaner finishing details. If painting is included in the design, applying a primer before outdoor paint improves coverage and weather resistance. Planning the structure before assembly is also important because stacked designs need balanced weight distribution to remain stable.
Outdoor placement should be considered before construction starts. Bird baths perform best in partially shaded areas that protect water from overheating while still remaining visible to birds. Flat surfaces help prevent tipping and improve long-term durability. Drainage and cleaning access should also be planned during setup. Taking time to organize materials and map the arrangement beforehand reduces mistakes and helps create a more polished final result suitable for Pinterest-style outdoor inspiration.
Idea 1: Rustic Stacked Terracotta Bird Bath
How to Create
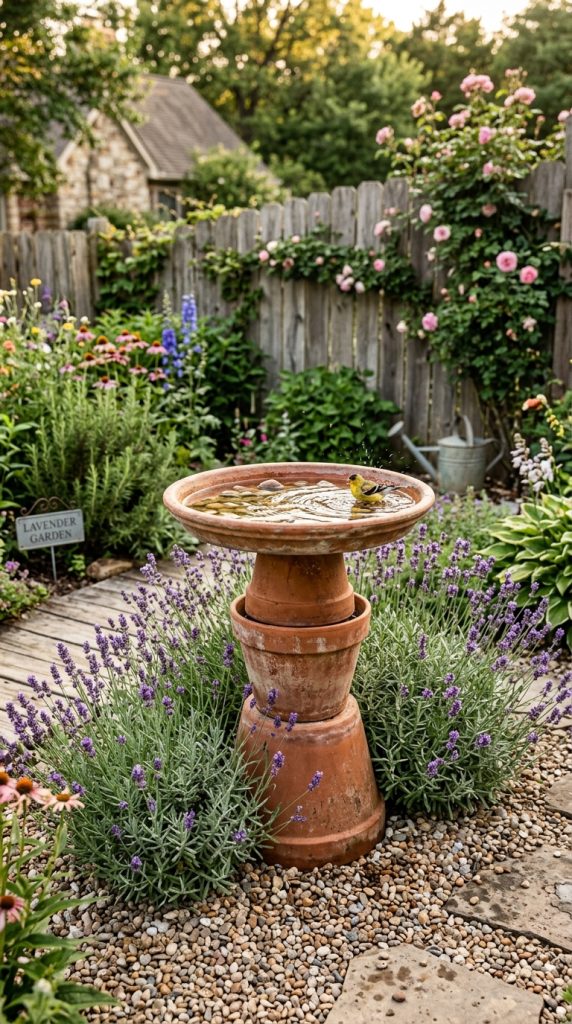
A rustic stacked terracotta bird bath creates a traditional garden centerpiece using multiple clay pots arranged vertically with a large saucer at the top. This design works well in farmhouse gardens, cottage landscapes, and natural outdoor decoration themes because the terracotta texture blends smoothly with plants, stones, and wooden features. The stacked appearance adds height to garden organization while keeping the structure visually balanced and simple to maintain. Many Pinterest ideas use this style because it looks handmade yet polished, making it suitable for both beginner friendly DIY projects and more advanced decorative arrangements.
The design can remain natural with sealed terracotta surfaces or include muted paint finishes in earthy tones such as beige, olive, or weathered gray. Decorative gravel around the base helps integrate the structure into flower beds or patio corners. A shallow water dish at the top encourages birds to use the bath safely while preventing excessive water depth. The layered structure also creates visual movement that makes small gardens feel more dynamic. Rustic clay textures pair especially well with lavender, ivy, ornamental grass, and climbing plants that soften the edges and create a balanced outdoor aesthetic suitable for modern Pinterest inspiration trends.
To build this bird bath, start by selecting three clay pots in gradually decreasing sizes along with one large saucer. Place the largest pot upside down on a flat outdoor surface as the foundation. Secure the medium pot on top using waterproof construction adhesive and allow sufficient drying time. Add the smallest pot above the second layer, checking alignment carefully to maintain balance. Attach the saucer securely at the top and allow the full structure to cure according to adhesive instructions before adding water.
Once the structure is stable, apply outdoor sealant to protect the clay from moisture damage and temperature changes. If painting is desired, use weather-resistant outdoor paint in thin layers for better texture retention. Decorative stones or pebbles can be placed inside the saucer to give birds secure footing while bathing. Surrounding the base with mulch or garden gravel improves presentation and reduces mud accumulation after rain. Regular cleaning with mild soap and water helps maintain safe conditions for birds while preserving the handmade appearance of the project. This easy project combines practical planning with timeless outdoor decoration suitable for long-term garden use.
Idea 2: Mosaic Tile Clay Pot Bird Bath
Step-by-Step Guide
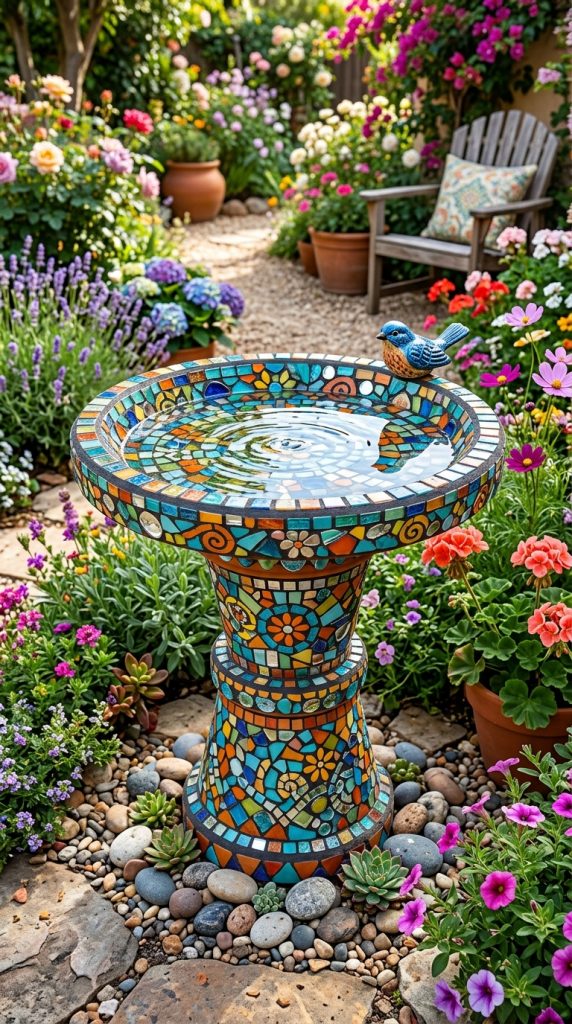
A mosaic tile clay pot bird bath adds artistic texture and color variation to outdoor spaces while maintaining practical functionality for birds. This design is popular within Pinterest ideas collections because it transforms basic clay materials into a decorative centerpiece with handcrafted detail. Mosaic surfaces reflect light differently throughout the day, creating visual interest that works especially well in patios, flower gardens, and small courtyard spaces. The combination of terracotta and colorful tile fragments also allows flexible customization for minimalist style themes, Mediterranean garden aesthetics, or modern design arrangements.
The mosaic approach supports creative ideas because patterns can remain symmetrical or abstract depending on the desired look. Neutral tones create subtle decoration, while brighter colors produce a more dramatic focal point. Small glass stones, broken ceramic pieces, or flat marbles can all contribute to the mosaic texture. The bird bath remains functional while serving as outdoor artwork that enhances organization within landscaped areas. This type of DIY tutorial appeals to beginners because imperfections in tile placement often improve the handmade appearance rather than reducing quality. The result feels personal, decorative, and highly adaptable to seasonal outdoor inspiration trends frequently featured in creative Pinterest boards.
Begin construction by assembling a stable clay pot base using one large inverted pot and a matching saucer secured with waterproof adhesive. Allow the structure to dry fully before applying decorative materials. Sketching the mosaic pattern beforehand helps organize colors and spacing efficiently. Spread weather-resistant tile adhesive in small sections to avoid premature drying. Press tile fragments gently into place while maintaining narrow gaps for grout application later. Continue covering the desired surfaces gradually for better accuracy and cleaner alignment.
After the adhesive cures, apply outdoor grout across the mosaic using a rubber spreader or gloved hand. Push grout firmly into gaps and wipe excess material from tile surfaces with a damp sponge before it hardens. Once dry, seal the entire mosaic using waterproof outdoor sealant to protect against moisture and temperature changes. Add smooth stones inside the water dish to support bird safety and reduce slipping. Position the finished bird bath in a stable area surrounded by flowers or decorative gravel for stronger visual impact. Regular maintenance includes removing debris, refreshing water frequently, and checking grout condition over time to preserve the handmade decoration and long-term outdoor durability.
Idea 3: Minimalist White Clay Pot Bird Bath
How to Make
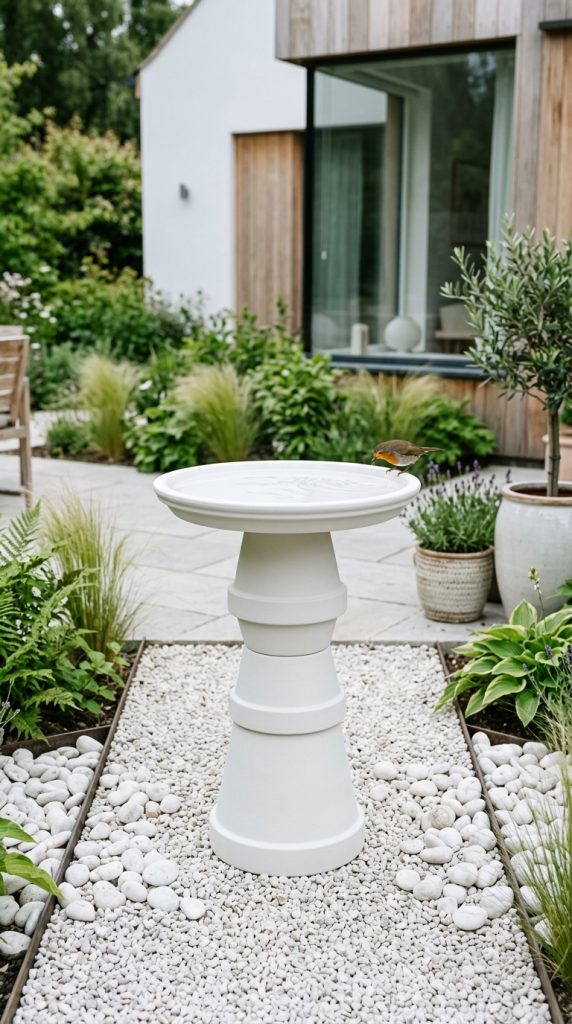
A minimalist white clay pot bird bath focuses on simplicity, clean lines, and modern design balance. This style fits contemporary outdoor spaces where decoration remains subtle but intentional. Pinterest inspiration frequently highlights minimalist style garden projects because they create calm visual organization without excessive detail. White-painted clay pots provide a bright contrast against greenery, stone pathways, and wooden furniture while maintaining a soft handmade appearance. The overall structure appears elegant yet approachable, making it suitable for small patios, apartment balconies, or compact garden layouts.
The minimalist approach depends on careful proportion and restrained decoration rather than heavy embellishment. Smooth finishes, symmetrical stacking, and neutral tones create a refined aesthetic that works well in Scandinavian-inspired outdoor settings or modern home decor environments. The design also supports practical maintenance because smooth painted surfaces are easier to clean and monitor. This easy project appeals to beginners who want a professional-looking result without complicated crafting techniques. White surfaces reflect sunlight effectively, helping the bird bath remain visually prominent even in heavily planted outdoor spaces.
Adding a few natural stones or simple greenery around the base reinforces the clean design without overcrowding the arrangement. This type of bird bath works especially well near seating areas where calm outdoor styling contributes to relaxation and visual balance. The combination of handmade creativity and modern simplicity makes it a strong choice for trending ideas on Pinterest.
To construct the bird bath, select two medium clay pots and one wide saucer with smooth edges. Place the larger pot upside down as the base and secure the second pot on top using waterproof adhesive. Attach the saucer carefully to the upper surface while checking balance from multiple angles. Allow the structure to cure completely before painting. Sanding the clay lightly beforehand improves paint adhesion and creates a smoother final texture.
Apply exterior primer followed by several thin layers of matte white outdoor paint. Thin coats help prevent cracking and preserve the natural texture of the clay beneath the finish. Once dry, seal the painted surfaces using weather-resistant sealant for durability. Place polished white stones or pale gravel inside the water dish for added texture while maintaining the minimalist style. Position the bird bath in a simple outdoor setting with limited surrounding decoration to preserve visual clarity. Cleaning the surface regularly prevents dirt buildup that may reduce the crisp appearance associated with minimalist outdoor design and Pinterest-style aesthetic organization.
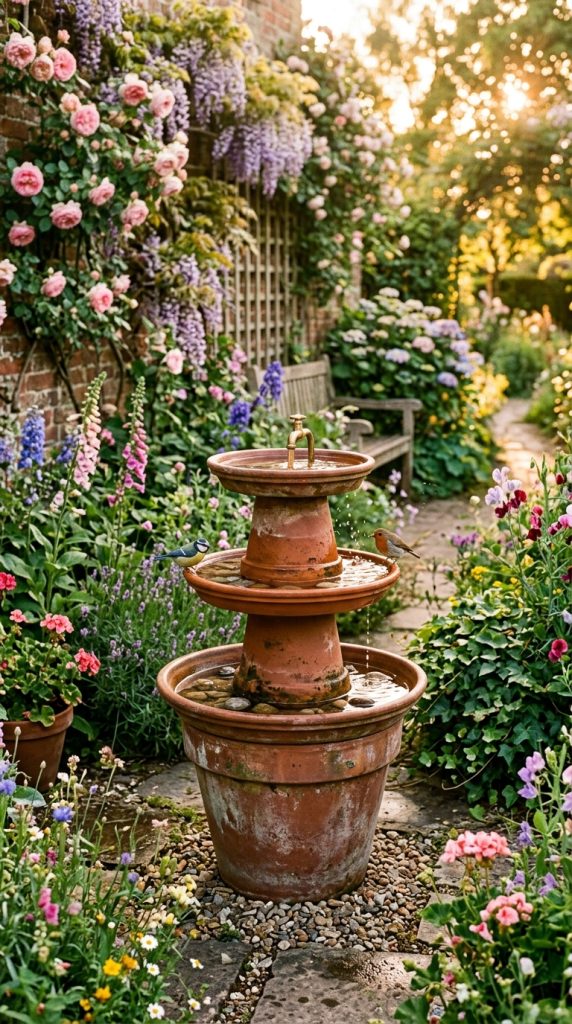
Idea 4: Tiered Garden Fountain Style Bird Bath
Execution Process
A tiered garden fountain style bird bath combines decorative layering with the appearance of a traditional outdoor water feature. Although the design may remain non-functional as a fountain, its stacked saucers create visual depth that resembles cascading water levels. This concept appears frequently in Pinterest ideas because it adds height and architectural structure to gardens without requiring complex installation systems. The layered arrangement also creates multiple resting areas for birds while improving the overall decorative impact within flower beds or patio corners.
The structure works especially well in cottage gardens, vintage-inspired landscapes, and rustic outdoor settings where layered textures enhance visual richness. Using terracotta pots and saucers in graduating sizes creates natural proportion while allowing additional decorative opportunities through paint, rope accents, or weathered finishes. This DIY tutorial appeals to people seeking handmade outdoor decoration that feels substantial without becoming overly expensive or difficult to maintain. The multiple levels also create opportunities for integrating succulents, trailing greenery, or decorative stones into the overall arrangement.
The fountain-inspired shape helps organize outdoor spaces by acting as a central focal point. Its vertical structure draws attention upward, making smaller areas appear more dynamic and balanced. Combining functionality with aesthetic presentation gives this creative project long-term decorative value suitable for seasonal garden updates and modern Pinterest inspiration boards focused on DIY outdoor styling.
Start construction with one large clay pot placed upside down as the foundation. Add progressively smaller pots on top using strong waterproof adhesive between each layer. Position large saucers between selected levels to create the appearance of cascading tiers. Careful alignment is important because uneven stacking may reduce stability over time. Allow each section to dry before continuing upward to improve structural support and prevent shifting during assembly.
Once the structure is complete, apply sealant to protect all clay surfaces from moisture exposure. Weathered paint effects can be added using dry-brush techniques in muted tones such as gray, cream, or soft green. Decorative gravel around the base improves drainage and strengthens the overall presentation. Fill the upper saucer with shallow water and place smooth stones inside to create safe bird footing. Small solar lights or trailing plants may also be positioned around lower tiers for additional decoration. Regular maintenance includes monitoring adhesive strength, cleaning water areas frequently, and removing leaves or debris that collect between the stacked saucers. Proper setup and planning help maintain the layered structure while preserving its Pinterest-inspired garden aesthetic.
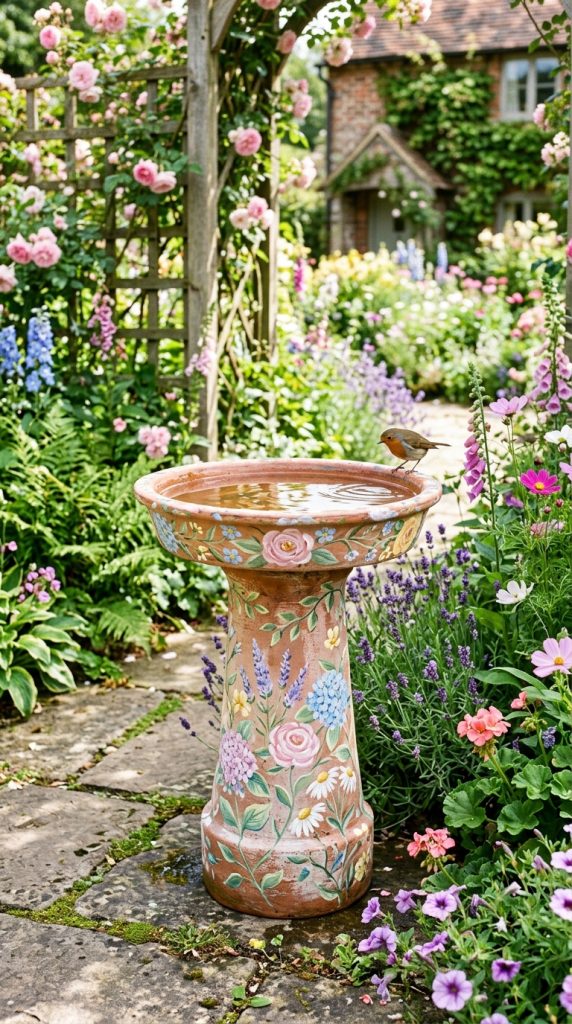
Idea 5: Floral Painted Clay Pot Bird Bath
Setup Method
A floral painted clay pot bird bath combines practical garden functionality with decorative artwork inspired by flowers, vines, and botanical patterns. This design style appears often in Pinterest inspiration collections because it introduces color and personality into outdoor spaces while remaining beginner friendly and accessible. Hand-painted floral details transform simple clay pots into decorative garden accents that complement flower beds, patios, and seasonal outdoor arrangements. The project supports creative ideas through customizable patterns ranging from delicate wildflowers to larger painted botanical illustrations.
The floral approach works especially well in cottage gardens, vintage-inspired patios, and handmade outdoor decoration themes where artistic details create warmth and visual softness. Light pastel backgrounds combined with painted greenery or blossoms help the bird bath blend naturally with surrounding plants. Floral motifs also support seasonal customization because color palettes can shift according to spring, summer, or autumn outdoor styling preferences. This type of DIY tutorial appeals to beginners because hand-painted designs do not require perfect precision to appear attractive and authentic.
The painted surface allows outdoor spaces to feel more personalized while maintaining the practical purpose of providing water for birds. Floral bird baths also photograph well, contributing to their popularity among trending ideas shared across Pinterest boards focused on garden decoration, home decor inspiration, and easy handmade projects. Their balance between functionality and artistic presentation makes them versatile additions to many outdoor layouts.
Begin the setup by cleaning and drying all clay surfaces thoroughly before painting. Assemble the bird bath using one inverted clay pot and a large saucer attached securely with waterproof adhesive. Once dry, apply outdoor primer to create a stable base for paint. Sketch floral patterns lightly with pencil before adding color. Acrylic outdoor paint works well for flowers, leaves, vines, and decorative borders because it provides flexibility and weather resistance.
Use thin paint layers to avoid texture buildup and allow each color section to dry before adding details. After completing the floral artwork, seal the entire surface with transparent outdoor sealant to protect against moisture and fading. Add small stones inside the saucer to support safe bird movement and improve the overall appearance. Position the bird bath near flowering plants to strengthen visual coordination with the painted design. Regular cleaning and occasional touch-up painting help preserve the decorative details over time. Careful planning and weather protection ensure the handmade artwork remains vibrant while continuing to function as practical outdoor decoration suitable for Pinterest-style garden inspiration.
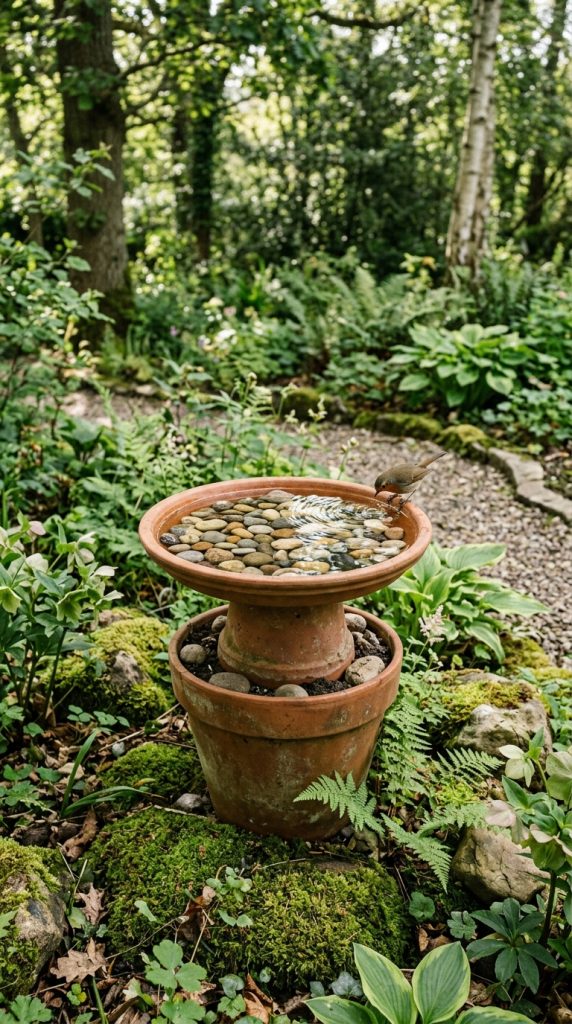
Idea 6: Pebble Base Natural Bird Bath
How to Create
A pebble base natural bird bath emphasizes organic textures and earthy outdoor styling using clay pots combined with river stones, gravel, and natural materials. This design suits gardens focused on rustic decoration, woodland themes, or minimalist style landscaping where natural elements create calm visual harmony. Pinterest ideas often feature pebble-based outdoor projects because they blend smoothly into gardens without appearing overly manufactured. The combination of terracotta and stone textures also creates strong visual contrast while maintaining a soft and grounded appearance.
The natural design encourages integration with surrounding greenery, making the bird bath feel like part of the landscape rather than a separate decorative object. Pebbles can be arranged around the base, attached to exterior surfaces, or placed inside the water dish to improve bird safety and visual texture. Earth-tone color palettes support modern design trends focused on simplicity, sustainability, and organic decoration. This DIY tutorial remains beginner friendly because the irregularity of natural stones allows flexible arrangement without strict precision requirements.
A pebble bird bath also performs well in outdoor environments because stone materials help stabilize the structure and reduce slippery surfaces around water. The result is a creative project that combines practical functionality with handmade aesthetic value. Its adaptable appearance allows it to complement flower gardens, vegetable plots, patios, and shaded relaxation areas commonly featured in Pinterest outdoor inspiration collections.
To create the structure, begin with one large clay pot placed upside down as the main support. Secure a wide saucer to the top using waterproof adhesive and allow the assembly to dry completely. Wash all pebbles thoroughly before use to remove dirt and improve adhesive bonding. Apply outdoor construction adhesive gradually around the exterior base and press stones firmly into place section by section. Varying pebble sizes creates more natural texture and stronger visual depth.
After completing the pebble surface, apply clear outdoor sealant to protect the clay and stabilize decorative materials. Fill the bird bath with shallow water and place several flat stones inside for bird footing. Decorative gravel or mulch surrounding the base improves drainage and strengthens the natural appearance. Position the bird bath near shrubs or plants where birds can approach safely while remaining visible from outdoor seating areas. Maintenance includes rinsing the pebble surfaces periodically to prevent algae buildup and refreshing water frequently for cleanliness. Proper placement and weather-resistant finishing help maintain the natural handmade appearance while supporting long-term outdoor durability and Pinterest-inspired aesthetic organization.
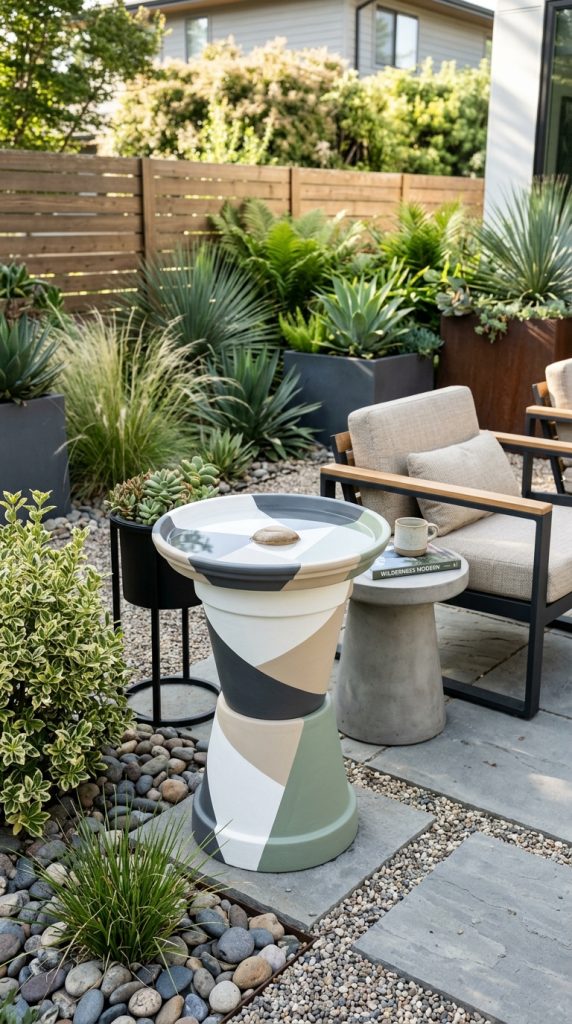
Idea 7: Color Block Modern Bird Bath
Step-by-Step Guide
A color block modern bird bath uses geometric paint sections and contrasting tones to create a contemporary outdoor decoration piece with strong visual structure. This idea aligns with modern Pinterest inspiration because it combines minimalist style principles with bold artistic presentation. Clay pots provide a neutral surface for experimenting with color placement while maintaining the handmade character associated with DIY outdoor projects. The finished bird bath works especially well in patios, urban balconies, and modern garden spaces where clean lines and organized decoration dominate the overall aesthetic.
Color blocking allows flexibility in design planning because combinations can remain subtle or highly contrasting depending on the surrounding environment. Neutral shades such as white, charcoal, and beige create a refined modern design appearance, while muted blues, terracotta reds, or sage greens add warmth without overwhelming the space. The geometric arrangement also helps smaller outdoor areas appear more intentional and visually organized. This easy project appeals to beginners because straight paint sections are simpler to execute than detailed artwork or mosaic patterns.
The modern style supports creative ideas centered around outdoor organization and curated decoration. Simple forms combined with structured paint placement produce a polished appearance that resembles professionally designed garden decor. This balance between practicality and artistic presentation explains why color block bird baths continue appearing in trending ideas shared across Pinterest home decor and DIY inspiration collections.
Begin assembly using two clay pots of different sizes and one large saucer. Secure the pots vertically using waterproof adhesive and attach the saucer at the top after checking alignment carefully. Allow the structure to cure completely before painting. Use painter’s tape to divide sections into geometric shapes or horizontal bands. Planning the color arrangement beforehand helps maintain visual balance and cleaner transitions between shades.
Apply outdoor paint in thin layers within each taped section and allow complete drying before removing tape. Multiple light coats improve durability and create smoother coverage. Once all colors are finished, apply clear outdoor sealant to protect against moisture and sunlight exposure. Add decorative stones inside the saucer to support bird safety while maintaining the modern aesthetic. Place the finished bird bath near simple outdoor furniture, potted plants, or gravel pathways to reinforce the organized visual style. Regular cleaning and occasional paint touch-ups help preserve the sharp geometric appearance. Careful planning and restrained decoration ensure the project maintains a modern Pinterest-inspired aesthetic while remaining practical and beginner friendly.
Idea 8: Hanging Clay Pot Bird Bath
How to Make
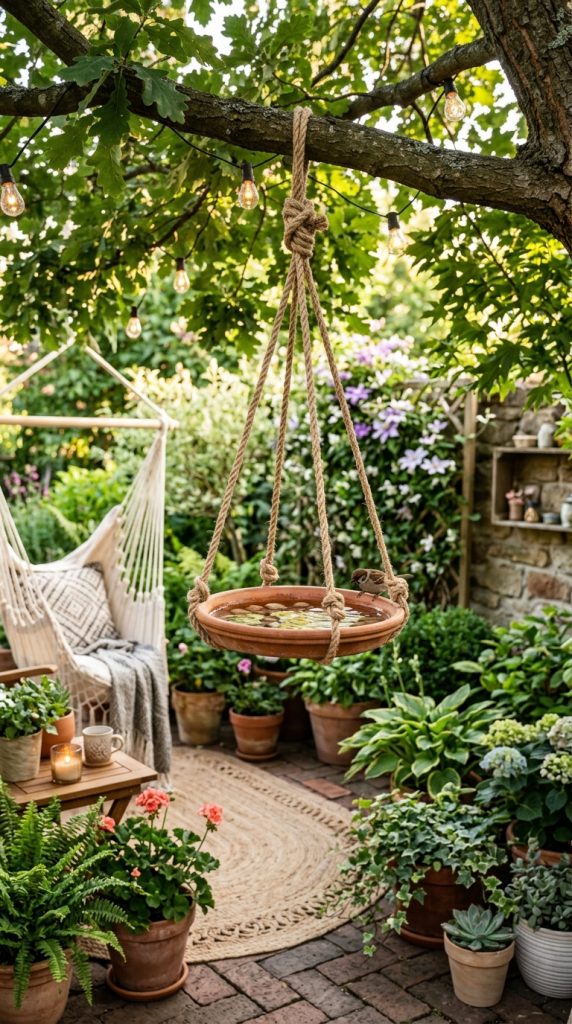
A hanging clay pot bird bath introduces vertical decoration into outdoor spaces while maximizing functionality in smaller areas. This design works especially well for balconies, patios, porches, and compact gardens where floor space remains limited. Pinterest ideas frequently feature hanging garden projects because they create layered outdoor organization while adding movement and visual interest above ground level. A suspended bird bath also provides birds with elevated access to water while keeping the area below open for plants or seating arrangements.
The hanging design supports many decorative styles including rustic, bohemian, minimalist style, and modern outdoor aesthetics. Clay saucers suspended with rope, chain, or sturdy cord create a lightweight handmade appearance that blends naturally with greenery and outdoor furniture. Decorative beads, knots, or painted surfaces can personalize the project while maintaining practical functionality. This DIY tutorial remains beginner friendly because the structure requires relatively few materials and limited assembly complexity.
Hanging bird baths also improve flexibility in outdoor planning because they can be repositioned seasonally according to sunlight, shade, or surrounding plant growth. The elevated placement reduces dirt accumulation from soil splashing and makes maintenance easier in certain settings. The combination of creative presentation and practical space-saving organization explains why hanging bird baths remain popular among trending ideas and Pinterest inspiration collections focused on handmade outdoor decoration.
Start by selecting a large clay saucer with sufficient depth for shallow water placement. Drill three evenly spaced holes near the rim using a masonry drill bit suitable for clay materials. Thread weather-resistant rope or metal chain through each opening and secure strong knots beneath the saucer for stability. Gather the upper ends together and attach them to a sturdy hanging hook capable of supporting the weight of water and clay safely.
Before hanging the bird bath outdoors, apply waterproof sealant to protect the clay surface from prolonged moisture exposure. Paint or decorative details can be added before sealing if desired. Place several small stones inside the saucer to improve bird footing and reduce slipping. Select a partially shaded location that remains visible but protected from strong wind. Hanging the bird bath near plants or small trees encourages bird activity while maintaining visual balance within the outdoor arrangement. Maintenance includes checking rope condition regularly, cleaning water frequently, and ensuring the hanging support remains secure. Proper planning and stable installation help maintain both safety and aesthetic presentation for this Pinterest-inspired creative project.
Idea 9: Vintage Distressed Clay Pot Bird Bath
Execution Process
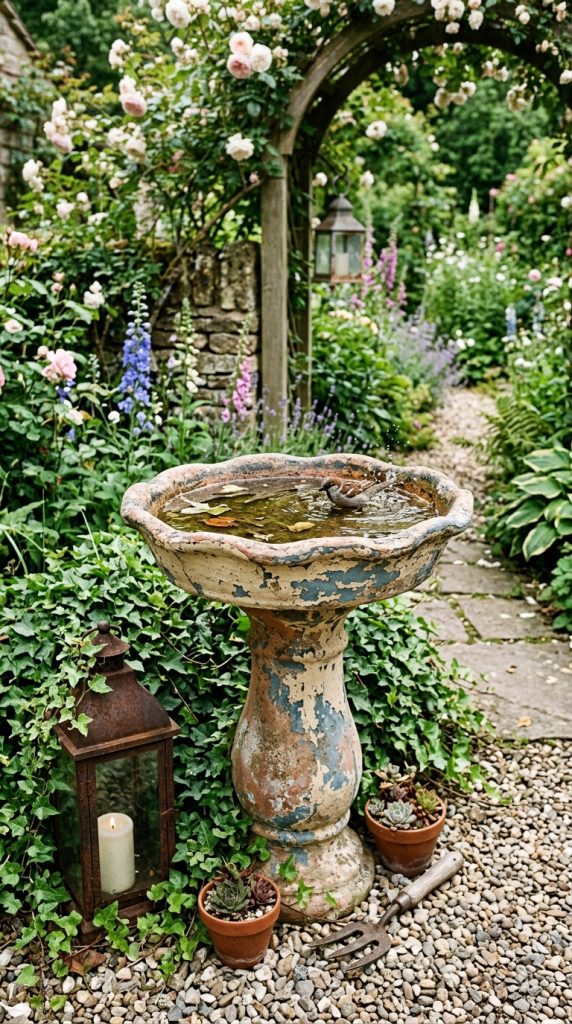
A vintage distressed clay pot bird bath creates an aged decorative appearance inspired by antique garden decor and weathered outdoor materials. This style remains popular within Pinterest inspiration boards because it combines rustic charm with handmade creativity while fitting cottage gardens, farmhouse patios, and romantic outdoor spaces. Distressed finishes soften the appearance of new clay pots, making them look naturally aged through layered paint techniques, sanding, and textured finishing methods. The result feels decorative and established rather than newly constructed.
Vintage styling works especially well alongside wooden furniture, climbing plants, metal lanterns, and traditional garden layouts. Soft neutral colors such as faded cream, dusty blue, muted green, or weathered gray contribute to the antique appearance without overwhelming surrounding decoration. Distressing techniques also make imperfections less noticeable, which keeps the project beginner friendly and accessible for people experimenting with outdoor DIY tutorials for the first time.
The handmade appearance adds warmth and personality while maintaining the practical function of providing water for birds. Pinterest ideas frequently emphasize decorative outdoor projects that appear collected over time rather than mass-produced. A distressed bird bath supports this trend by creating texture, character, and visual softness within garden organization plans. The combination of aesthetic aging and functional outdoor decoration makes this creative project highly adaptable to many outdoor design themes.
Begin construction using one large inverted clay pot as the base and attach a wide saucer securely at the top with waterproof adhesive. Allow the structure to dry fully before beginning the painting process. Apply a base coat of outdoor paint in the chosen vintage shade and let it dry completely. Add a second lighter or darker layer over selected areas to create depth and variation. Once partially dry, sand edges and raised surfaces gently to expose portions of the underlying paint and terracotta texture.
After distressing, apply transparent outdoor sealant to preserve the finish while protecting against weather damage. Decorative details such as rope trim, stencil patterns, or subtle floral accents may be added for additional texture. Place flat stones inside the saucer to support bird footing and maintain shallow water levels. Position the bird bath among flowers, ivy, or gravel pathways to strengthen the antique garden atmosphere. Maintenance includes occasional repainting of heavily exposed areas and regular cleaning to prevent algae buildup. Careful layering and controlled sanding techniques help create a realistic weathered appearance suitable for Pinterest-style vintage outdoor decoration inspiration.
Idea 10: Succulent Planter Bird Bath Combination
Setup Method
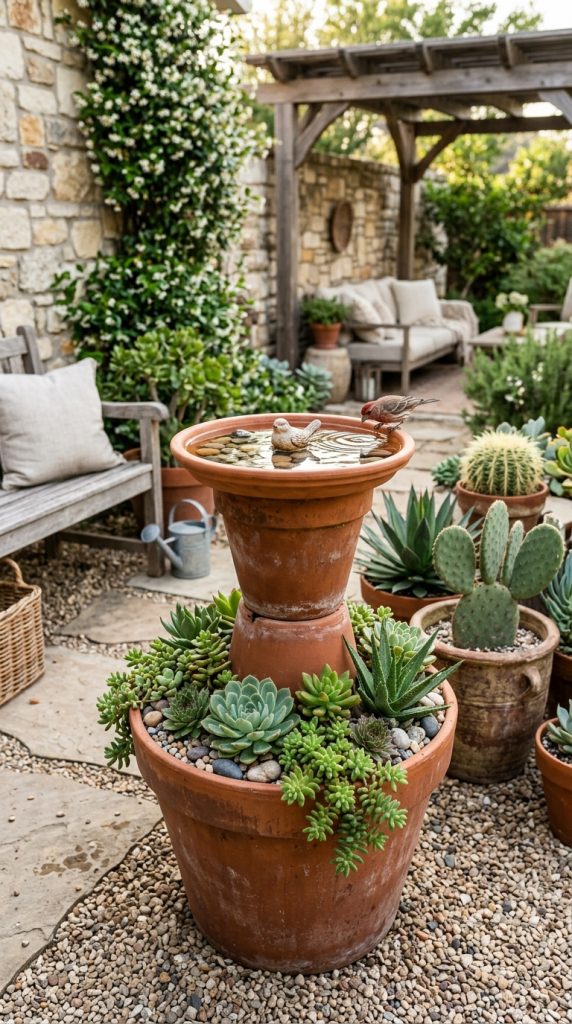
A succulent planter bird bath combination merges plant organization with functional outdoor decoration by integrating small succulent arrangements into the clay pot structure. This concept remains highly visible in Pinterest ideas because it combines multiple garden purposes within one compact handmade project. The design allows the bird bath to serve as both a wildlife feature and a decorative planter, making it ideal for patios, balconies, and smaller gardens where space efficiency is important. Succulents also complement terracotta textures naturally because their muted green tones and sculptural shapes enhance rustic and minimalist style aesthetics.
The arrangement creates visual contrast between water surfaces and dry planting textures, adding depth and balance to outdoor layouts. Succulents require relatively low maintenance, which keeps the overall project practical for beginners. Decorative gravel, moss, or small stones around the plants help organize the structure while improving drainage and presentation. This DIY tutorial appeals to people seeking creative ideas that combine organization, home decor inspiration, and functional gardening into one easy project.
The layered appearance also contributes to modern Pinterest trends focused on mixed-use outdoor decoration. Combining handmade planting sections with a bird bath creates a more dynamic focal point than a standard water dish alone. The project supports customization through different succulent varieties, paint finishes, and clay pot arrangements that match changing seasonal decoration styles and outdoor planning goals.
Start the setup using a large clay pot as the foundation and attach a wide bird bath saucer securely at the top. Additional smaller clay pots or side saucers can be attached around the base for succulent planting sections. Use waterproof adhesive carefully and allow all components to cure fully before adding soil or water. Fill the planting areas with well-draining cactus soil suitable for succulents and arrange plants according to size and growth pattern.
Apply outdoor sealant to exposed clay surfaces to improve weather resistance while avoiding direct contact with planting soil. Decorative gravel around the succulents improves moisture control and enhances the finished appearance. Add shallow water to the bird bath and include several flat stones for safe bird access. Position the structure in an area with partial sunlight suitable for both bird activity and succulent health. Maintenance includes trimming plants periodically, refreshing water frequently, and monitoring drainage during rainy conditions. Proper planning and balanced arrangement help maintain the dual-purpose functionality while creating a Pinterest-inspired outdoor centerpiece that combines practical gardening with decorative handmade creativity.
Common Beginner Mistakes and How to Avoid Them
Many beginner DIY bird bath projects fail because of poor structural planning, improper material preparation, or incorrect outdoor placement. One common mistake involves stacking clay pots without checking balance before adhesive dries. Uneven alignment can create unstable structures that tip easily once water is added. Testing placement beforehand and allowing each layer to dry completely improves long-term durability. Another frequent problem is skipping waterproof sealant. Unsealed clay absorbs moisture, which may lead to cracking during temperature changes or heavy rain exposure.
Using deep water dishes is another issue often overlooked in beginner friendly tutorials. Birds prefer shallow water areas with stable footing. Adding smooth stones inside the saucer helps improve safety and accessibility. Poor paint selection can also reduce project lifespan because indoor paint fades and peels quickly outdoors. Choosing weather-resistant outdoor paint and primer improves durability significantly.
Placement mistakes also affect functionality. Bird baths positioned in direct sunlight may overheat quickly and require constant water replacement. Areas without nearby plants or resting spaces may discourage bird activity entirely. Cleaning neglect is another major issue because stagnant water attracts insects and algae. Regular maintenance keeps the bird bath attractive and safe for wildlife. Careful planning, stable assembly, weather protection, and consistent cleaning help beginners achieve better results while preserving the handmade aesthetic associated with Pinterest-inspired outdoor decoration projects.
Practical Tips for Better Results
Careful preparation improves both the appearance and durability of DIY bird bath clay pots ideas. Selecting thicker terracotta pots reduces the chance of cracking and creates a more stable structure for stacked arrangements. Cleaning and sanding surfaces before painting or sealing also improves material adhesion and creates smoother finishes. Working slowly during assembly helps maintain alignment while reducing errors that become difficult to correct after adhesive hardens.
Outdoor paint should always be applied in several thin layers rather than one thick coat. Thin applications dry more evenly and reduce peeling over time. Using neutral or earthy colors often helps the bird bath blend naturally into outdoor environments while maintaining aesthetic flexibility for changing garden decoration themes. Adding decorative stones inside water dishes improves bird safety and also enhances visual texture.
Positioning the bird bath near shrubs or small plants encourages bird activity because nearby cover creates a sense of protection. However, placing the structure too close to dense branches may increase debris accumulation. Partial shade generally provides the best balance between visibility and temperature control. Refreshing water regularly helps maintain cleanliness while reducing algae growth and insect activity.
For stronger Pinterest inspiration appeal, surrounding the bird bath with gravel, flowers, or matching planters creates a more organized presentation. Small lighting elements or subtle decorative accents can also improve nighttime visibility without overwhelming the design. Consistent maintenance and careful material choices help preserve both functionality and decorative quality over time.
Styling, Presentation, or Organization Ideas
The presentation of a clay pot bird bath significantly influences how well it integrates into outdoor organization and overall garden decoration. Positioning the bird bath as a focal point within flower beds creates visual structure and helps guide attention naturally through the landscape. Surrounding the base with mulch, gravel, or natural stones improves drainage while adding texture that complements terracotta surfaces. Grouping the bird bath with planters of varying heights also creates layered presentation similar to Pinterest-inspired garden styling layouts.
Minimalist style arrangements benefit from restrained decoration and clean spacing around the structure. Neutral gravel, simple greenery, and limited accessories maintain visual balance without overcrowding the area. Rustic outdoor themes work well with aged wood, climbing vines, and weathered metal accents that reinforce the handmade appearance of clay materials. Seasonal styling adjustments can also refresh the presentation throughout the year using flowers, ornamental grasses, or decorative stones in changing colors.
Lighting placement contributes strongly to evening presentation. Small solar lights positioned near the base create subtle illumination while emphasizing the texture of painted or mosaic surfaces. Pathways leading toward the bird bath help strengthen organization within larger gardens and improve visual flow. Combining the bird bath with seating areas or outdoor relaxation corners also increases practical enjoyment of the surrounding space. Thoughtful arrangement and coordinated decoration help transform a simple DIY project into a polished Pinterest-style outdoor centerpiece.
Budget or Time Planning
DIY bird bath clay pots ideas remain popular partly because they can fit many budget levels and time schedules. Simple stacked designs using basic terracotta pots and one saucer can often be completed within a single afternoon, especially when minimal painting or decoration is involved. More detailed projects such as mosaic or distressed finishes may require additional drying time and multiple work sessions. Planning the design beforehand helps reduce wasted materials and improves efficiency during construction.
Budget ideas often begin with reusing old clay pots already available from previous gardening projects. Cleaning and repainting existing materials significantly lowers costs while supporting sustainable DIY practices. Decorative elements such as stones, gravel, rope, or leftover paint can also be repurposed creatively. Purchasing all materials in advance prevents interruptions during assembly and helps maintain workflow organization.
Breaking larger projects into stages improves time management. One day can focus on cleaning and assembly, while later sessions handle painting, sealing, or decorative additions. Allowing proper drying time between steps prevents structural weakness and improves final appearance. Weather planning is equally important because outdoor humidity or rain can slow curing and affect paint quality.
For people managing multiple outdoor projects, choosing beginner friendly bird bath designs with simple structures may provide faster results while still delivering strong decorative impact. Organized planning, realistic scheduling, and careful material selection help maintain project quality without unnecessary expense or delays.
Creative Expansion and Advanced Inspiration
After completing a basic bird bath, many creative expansion ideas can transform the project into a larger outdoor design feature. Multi-level arrangements combining planters, lighting, and water elements create more complex garden focal points while maintaining the handmade appeal associated with Pinterest inspiration. Additional clay pots can support trailing plants, herbs, or succulents that visually connect with the bird bath structure and improve overall outdoor organization.
Advanced decoration techniques such as textured paint layering, engraved patterns, mosaic borders, or geometric color blocking can introduce more artistic detail. Combining materials like wood, stone, metal, or recycled glass also expands the range of possible styles from rustic farmhouse aesthetics to sleek modern design arrangements. Seasonal updates provide another method of creative expansion because removable decorative accents can refresh the appearance throughout the year without rebuilding the structure.
Water movement features may also be integrated using small solar-powered pumps designed for shallow outdoor water containers. Gentle circulation improves visual interest while helping maintain cleaner water conditions. Surrounding the bird bath with coordinated stepping stones, lanterns, or garden edging creates a more complete outdoor presentation suitable for Pinterest-style landscaping inspiration.
For larger outdoor spaces, creating matching clay pot decoration sets using similar paint colors or textures helps establish visual consistency across patios and garden pathways. Expanding beyond a single easy project allows handmade creativity to evolve gradually into a fully organized outdoor decoration theme that remains practical, aesthetic, and highly personalized.