

Tissue paper painted butterfly art is a creative craft technique that combines delicate paper textures with hand-painted details to produce decorative butterfly designs suitable for walls, frames, and creative displays. This art style is widely featured in Pinterest ideas because it blends simplicity with visual impact, making it appealing for both beginners and experienced DIY enthusiasts. The process focuses on shaping tissue paper into butterfly forms and enhancing them with paint to create layered color effects. It is commonly used in home decor, school projects, and handmade gift decoration. The flexibility of materials allows endless creative possibilities, from soft pastel aesthetics to bold modern design styles. This topic is especially useful for those seeking beginner friendly DIY tutorial inspiration that requires minimal materials but delivers artistic results. In this article, you will learn structured methods, creative variations, and practical approaches to designing tissue paper butterflies in multiple styles while maintaining balance between creativity and organization.
Why This Idea Is Trending or Useful
Tissue paper painted butterfly art has become popular in modern Pinterest ideas due to its accessibility, affordability, and adaptability in different creative spaces. It fits well into DIY culture because it requires basic materials and encourages experimentation without technical barriers. Many people are drawn to this craft because it supports home decor enhancement using handmade decoration techniques that feel personal and artistic. It also aligns with modern design trends such as minimalist style and soft aesthetic arrangements, making it suitable for bedrooms, study areas, and creative corners. The method is highly flexible, allowing users to explore creative ideas with color blending, layering, and texture building. Another reason for its popularity is its usefulness in budget ideas, where visually appealing results can be achieved without expensive supplies. It also works well for educational environments, helping learners understand color composition, symmetry, and artistic balance. Overall, this craft represents a trending combination of simplicity, creativity, and visual storytelling.
Materials and Preparation
Before starting tissue paper painted butterfly art, proper preparation ensures smooth execution and better results. The primary materials include tissue paper sheets, lightweight craft paper, watercolor or acrylic paint, brushes of different sizes, scissors, glue, and a clean working surface. Additional tools such as markers, sponges, and stencils can be helpful for adding texture and detail. Preparation begins by selecting a color palette based on the desired theme, such as pastel tones for soft aesthetic designs or vibrant shades for bold creative projects. It is also important to plan butterfly sizes and shapes in advance to maintain consistency, especially when creating multiple pieces for wall decoration or organization displays. Cutting templates or sketch outlines can help guide the shaping process. The workspace should be organized to avoid paint spills and paper damage. Keeping materials within reach supports efficient workflow. This preparation stage is essential for maintaining structure in any beginner friendly DIY tutorial.
Idea 1: Soft Pastel Layered Butterfly Wall Display
How to Create
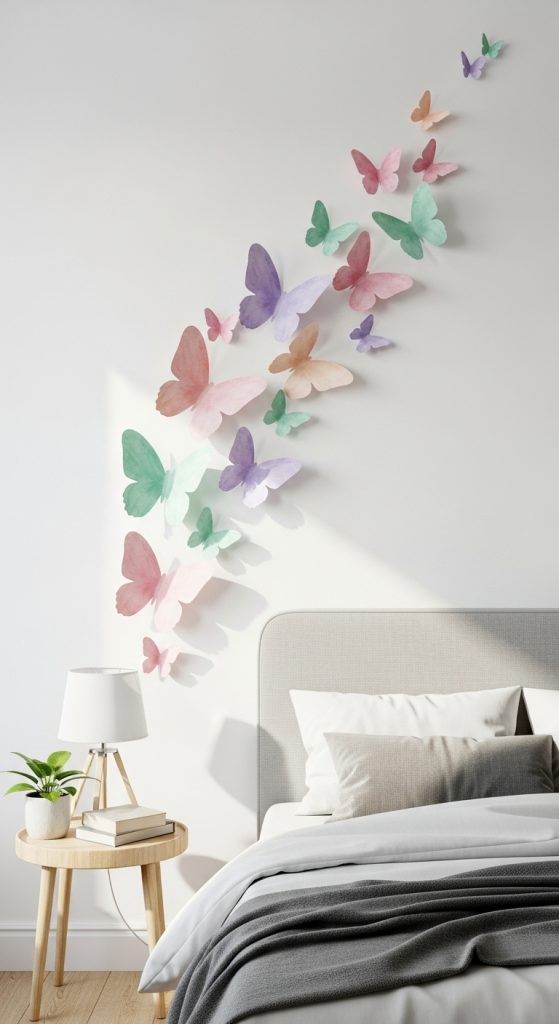
Soft pastel layered butterfly wall displays focus on creating visually gentle and harmonious compositions using multiple shades of light-colored tissue paper. This concept is widely used in home decor because it produces a calming aesthetic suitable for bedrooms, reading spaces, and minimalist interiors. The layering technique involves stacking tissue paper pieces in slightly varied pastel tones to form depth and dimension. Each butterfly becomes a soft visual element that contributes to an overall unified arrangement. The appeal lies in its subtle color transitions, which reflect modern design principles that prioritize simplicity and balance. This idea is particularly effective for those exploring Pinterest ideas related to wall art and creative decoration. It also encourages experimentation with color blending without overwhelming visual intensity. The final result creates a floating effect on walls, giving the impression of movement and lightness. This makes it ideal for beginners who want an easy project with professional-looking outcomes.
To create this design, begin by selecting tissue paper in pastel shades such as soft pink, lavender, mint, and light peach. Cut butterfly shapes using a stencil or freehand method, ensuring consistency in size. Layer two to three pieces of tissue paper for each butterfly to achieve depth. Lightly paint edges or center areas with diluted watercolor to enhance blending. Allow each layer to dry before assembling. Use glue sparingly to avoid wrinkling. Once butterflies are ready, arrange them on a wall in flowing patterns that mimic natural movement. Planning placement beforehand ensures balanced composition. This step-by-step method supports beginner friendly DIY execution while maintaining artistic quality.
Idea 2: Bold Color Splash Butterfly Collage
How to Create
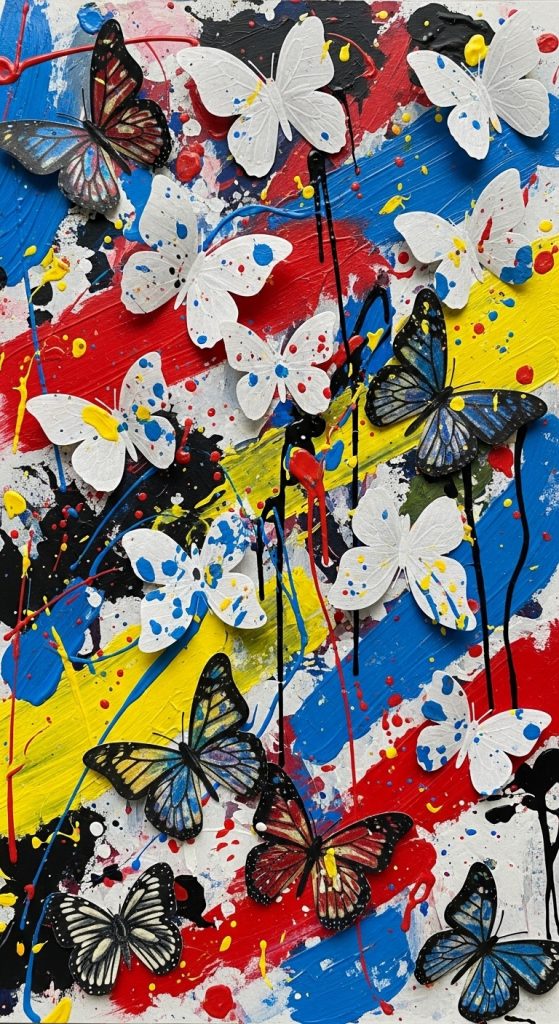
Bold color splash butterfly collages focus on high-contrast visual expression using vibrant paint combinations applied directly onto tissue paper surfaces. This style is often seen in Pinterest ideas that emphasize energetic and artistic freedom. The main concept is to create butterflies that stand out through intense color variation and dynamic brush techniques. Unlike soft pastel designs, this approach embraces unpredictability and expressive patterns. It is suitable for creative projects that aim to enhance home decor with strong visual impact. The collage format allows multiple butterflies to be arranged together, forming a cohesive decorative piece. This method is especially appealing for modern design lovers who prefer bold artistic statements. It also works well for classroom displays, art corners, and handmade decoration boards. The final result produces a lively composition that draws attention and highlights individual creativity.
To create this project, prepare tissue paper sheets and apply acrylic paint in bold shades such as red, blue, yellow, and black. Use sponges or thick brushes to create textured paint effects. After drying, cut butterfly shapes from painted sheets, ensuring each piece displays unique color patterns. Arrange butterflies on a canvas or board in overlapping formations to create depth. Secure them with glue and adjust spacing for balance. Additional detailing can be added using markers or fine brushes. This step-by-step DIY tutorial allows freedom of expression while maintaining structure through organized placement and layering techniques.
Idea 3: Minimalist Monochrome Butterfly Art Panels
How to Create
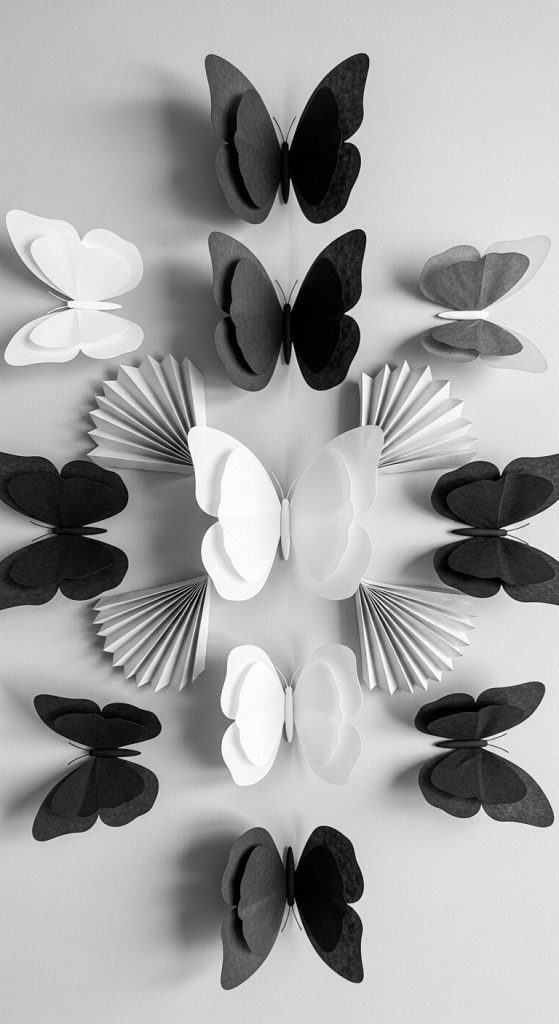
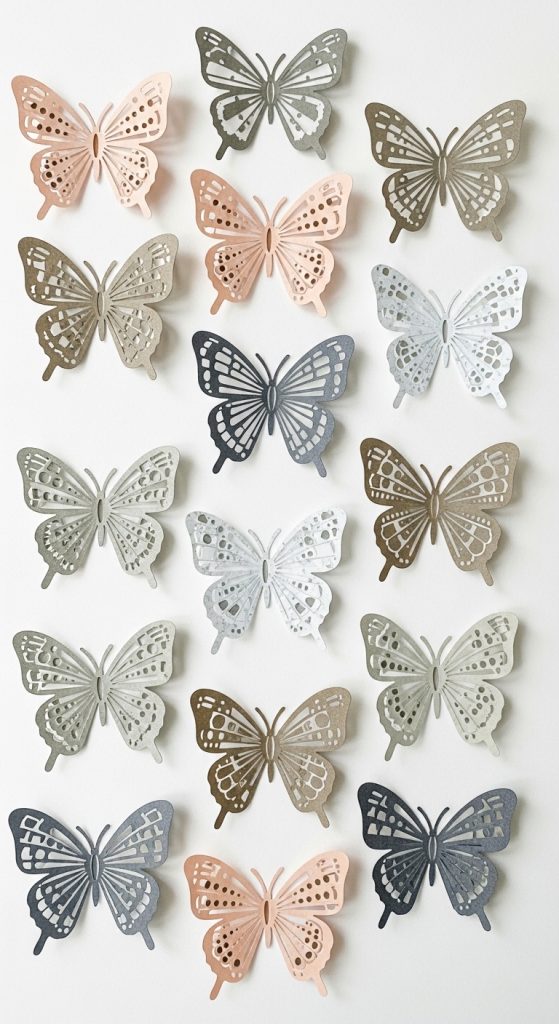
Minimalist monochrome butterfly art panels focus on simplicity and structured visual harmony using a single color palette. This design is popular in modern home decor due to its clean appearance and compatibility with minimalist style interiors. The concept involves using shades of one color, such as black, grey, or beige, to create subtle contrast within the butterfly shapes. This approach is ideal for those who prefer understated elegance rather than vibrant decoration. It also aligns with Pinterest ideas centered around organized and calming visual spaces. The design emphasizes shape clarity, symmetry, and balance, making it suitable for professional environments, study areas, or modern living rooms. The tissue paper texture adds softness to the otherwise structured monochrome theme, creating a refined handmade decoration effect. This method is especially effective for beginners who want simple yet sophisticated creative results.
To execute this idea, select tissue paper in different shades of a single color. Cut butterfly shapes with precise edges to maintain consistency. Lightly layer two sheets for subtle depth variation. Avoid heavy paint application and instead focus on tonal differences created through layering. Arrange butterflies on a plain background panel in symmetrical or linear patterns. Secure them carefully using minimal adhesive. This step-by-step tutorial emphasizes control, precision, and planning. The final composition should reflect balance and modern design principles while remaining easy to create as a DIY project.
Idea 4: Watercolor Gradient Butterfly Series
How to Create
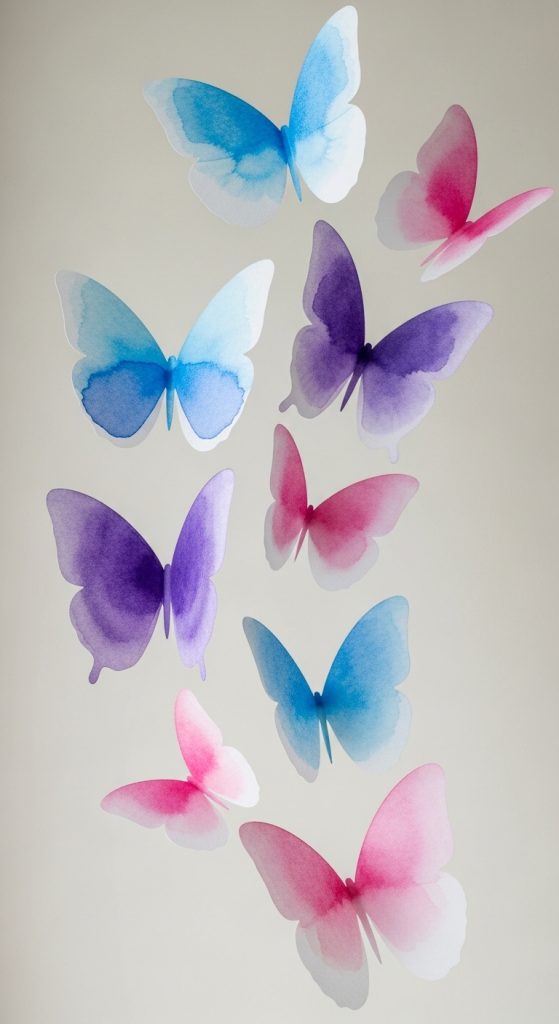
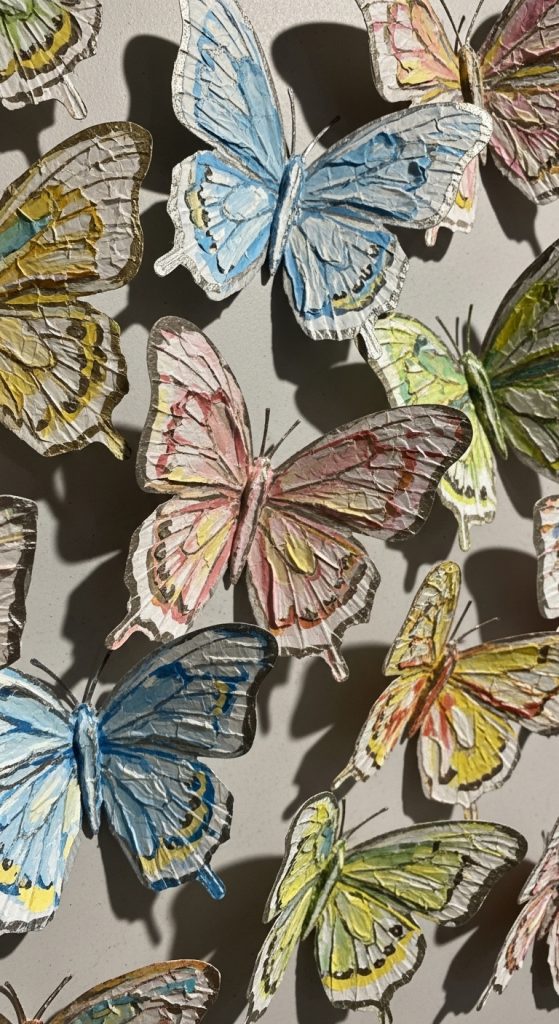
Watercolor gradient butterfly series designs focus on smooth color transitions that mimic natural fading effects found in artistic painting styles. This concept is widely used in Pinterest ideas because it combines softness with visual depth. The gradient effect is achieved by blending colors gradually across tissue paper surfaces, creating a seamless transition from one shade to another. This style is ideal for creative projects that aim to produce elegant and flowing visual arrangements. It works well in home decor settings where subtle artistic expression is preferred. The butterflies created through this method appear delicate and dynamic, giving the impression of movement. This technique also helps beginners understand color blending principles in a practical DIY tutorial format. The final result is suitable for wall displays, framed art pieces, or decorative installations.
To create this design, apply watercolor paint onto tissue paper using wet blending techniques. Start with one color and gradually introduce another while the surface is still damp. Allow the paper to dry completely before cutting butterfly shapes. Ensure each butterfly displays a different gradient variation for diversity. Arrange the butterflies in a sequence that reflects color progression. Use light adhesive for placement on walls or boards. This step-by-step process encourages experimentation while maintaining structured creative control.
Idea 5: Textured Tissue Collage Butterfly Art
How to Create
Textured tissue collage butterfly art emphasizes tactile depth by combining crumpled, layered, and painted tissue paper elements. This style is often used in creative ideas that focus on dimensional home decor and expressive handmade decoration. The texture plays a central role in defining the visual impact, making each butterfly appear sculptural rather than flat. This technique is suitable for beginners who want to explore creative projects involving material manipulation. It also aligns with modern design trends that value organic textures and layered aesthetics. The butterflies created through this method can be used in wall art installations or framed compositions. The irregular surfaces reflect light differently, adding visual interest and movement. This approach is ideal for DIY enthusiasts who want to experiment beyond flat paper designs.
To create this project, crumple tissue paper lightly before painting it with diluted acrylic colors. Once dry, flatten gently and cut butterfly shapes. Layer multiple textured pieces to enhance depth. Assemble butterflies using glue, ensuring edges remain slightly raised for dimensional effect. Arrange them on a base surface in a flowing pattern. This step-by-step method focuses on texture control and composition planning for balanced results.
Idea 6: Stenciled Pattern Butterfly Art Boards
How to Create
Stenciled pattern butterfly art boards focus on structured designs created using templates and repeated patterns. This concept is popular in Pinterest ideas because it offers precision and consistency while maintaining creative flexibility. The stencil method allows users to replicate butterfly shapes accurately across multiple pieces, making it suitable for organized home decor projects. Patterns such as dots, lines, and geometric shapes can be added to enhance visual interest. This approach is ideal for beginners who prefer guided DIY tutorials with predictable outcomes. It also works well for classroom decoration or themed wall displays where uniformity is important. The combination of tissue paper texture and stencil precision creates a balanced aesthetic that blends creativity with order. This method is widely used in minimalist style and modern design setups where structured visual harmony is preferred.
To create this design, prepare butterfly stencils and trace shapes onto painted tissue paper. Apply patterned details using markers or brushes before cutting. Repeat the process to produce multiple butterflies with consistent design themes. Arrange them on a board in symmetrical layouts or repeating sequences. Secure each piece carefully for stability. This step-by-step process ensures clean execution and visually organized results.
Idea 7: Mixed Media Butterfly Frame Art
How to Create
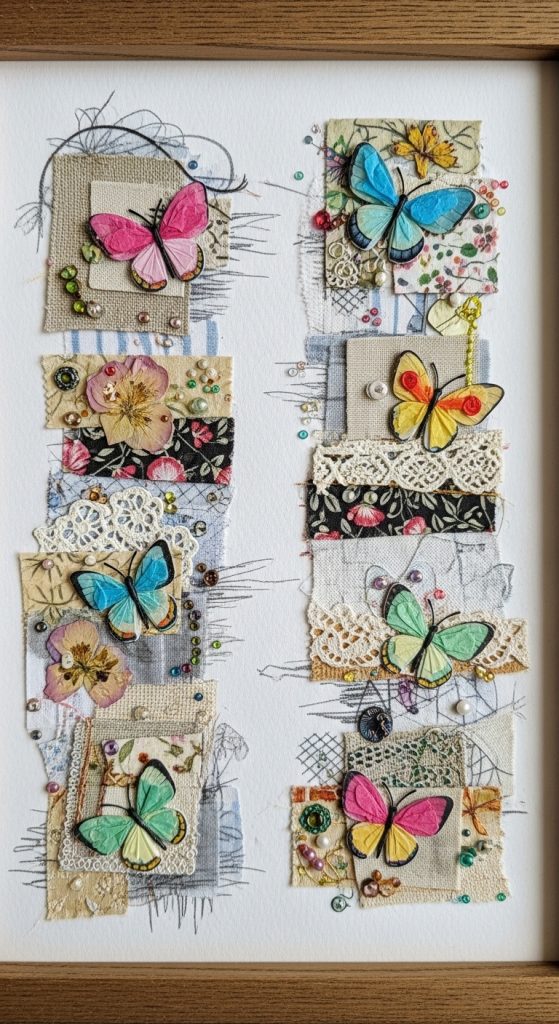
Mixed media butterfly frame art combines tissue paper with additional materials such as fabric scraps, sketch lines, and light decorative elements. This approach is widely featured in Pinterest ideas due to its versatility and artistic depth. The combination of different materials enhances visual complexity while maintaining a cohesive design structure. This style is ideal for home decor projects that aim to create framed wall pieces or display art. It encourages experimentation with texture, color, and layering, making it suitable for creative learners. The butterflies become focal points within a larger artistic composition. This method also supports handmade decoration techniques that emphasize originality and personal expression. It is particularly useful for those exploring advanced DIY tutorial concepts while still maintaining beginner friendly accessibility.
To create this design, prepare a frame base and arrange painted tissue paper butterflies along with additional decorative materials. Glue fabric accents or drawn elements to enhance composition. Layer butterflies at different depths to create visual hierarchy. Secure all elements within the frame carefully. This step-by-step process focuses on composition balance and mixed material integration.
Idea 8: Floating 3D Butterfly Installation
How to Create
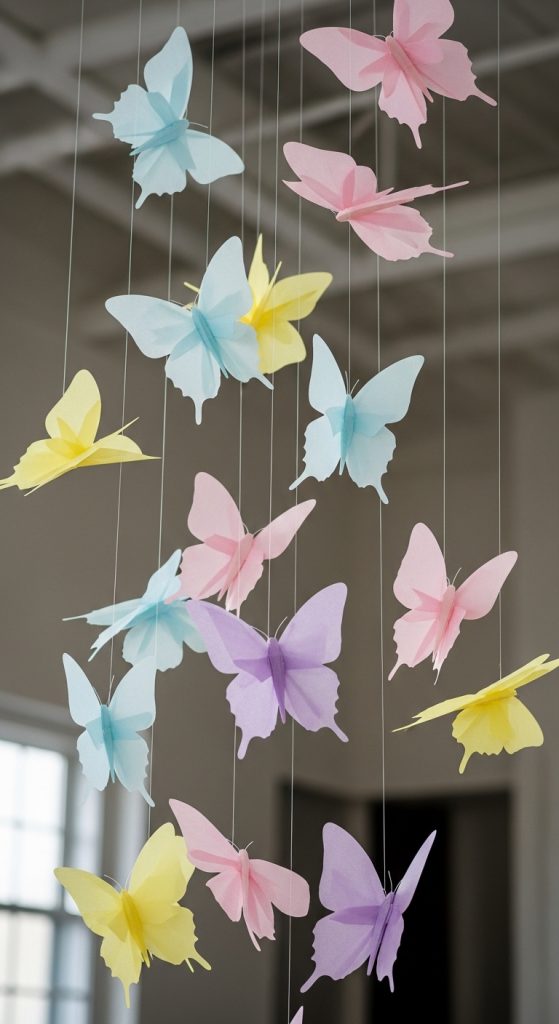
Floating 3D butterfly installations focus on creating suspended decorative arrangements that appear to move naturally in space. This concept is highly popular in modern home decor and Pinterest ideas due to its dynamic visual effect. The butterflies are designed using folded and layered tissue paper to create volume and structure. When suspended, they produce a floating illusion that enhances room aesthetics. This style is ideal for ceiling decorations, party setups, or creative corner displays. It adds depth and movement to interior spaces while maintaining a light handmade decoration feel. The design emphasizes spatial planning and balance, making it suitable for both small and large environments. This technique is especially appealing for those who enjoy creative projects that transform physical space through artistic arrangement.
To create this installation, prepare lightweight butterfly structures using layered tissue paper. Attach thin strings or transparent threads to each piece. Hang butterflies at varying heights to create depth and motion. Ensure spacing is balanced for visual harmony. This step-by-step method focuses on spatial arrangement and structural stability.
Idea 9: Floral Integrated Butterfly Composition
How to Create
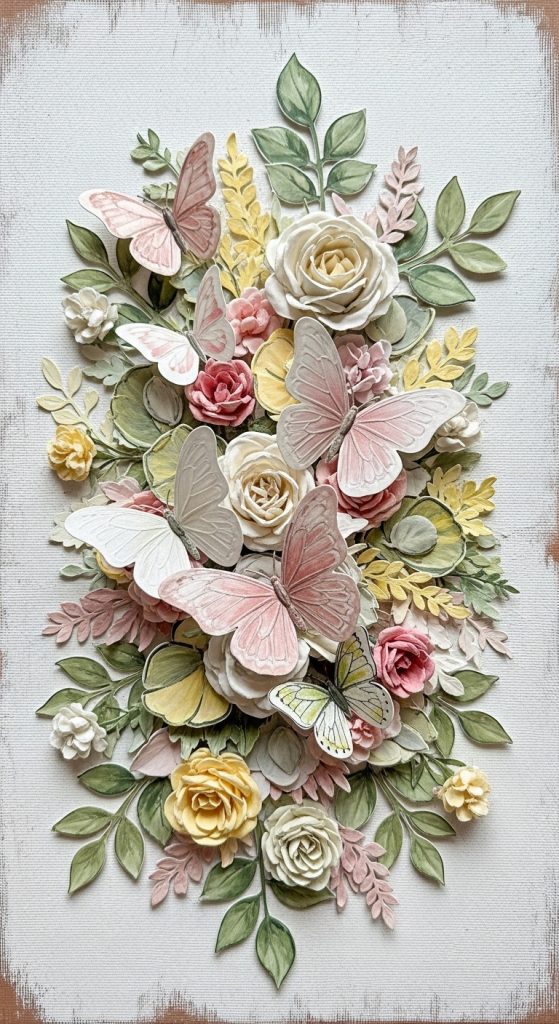
Floral integrated butterfly compositions combine butterfly designs with floral patterns to create nature-inspired artwork. This concept is frequently used in Pinterest ideas related to home decor and aesthetic arrangements. The integration of floral elements enhances visual softness and creates a natural storytelling effect. This style is suitable for wall art, greeting displays, or decorative panels. It reflects themes of growth, nature, and harmony, making it ideal for calming interior spaces. The combination of tissue paper butterflies and painted flowers produces a balanced composition that feels organic and artistic. This method supports creative exploration while maintaining structured design principles. It is also suitable for beginner friendly DIY tutorials focused on layered artistic expression.
To create this design, prepare butterfly shapes and painted floral elements on tissue paper. Arrange them together on a base surface, ensuring balanced spacing. Layer flowers behind butterflies for depth. Secure all elements with adhesive. This step-by-step process emphasizes natural composition and visual harmony.
Idea 10: Seasonal Theme Butterfly Art Sets
How to Create
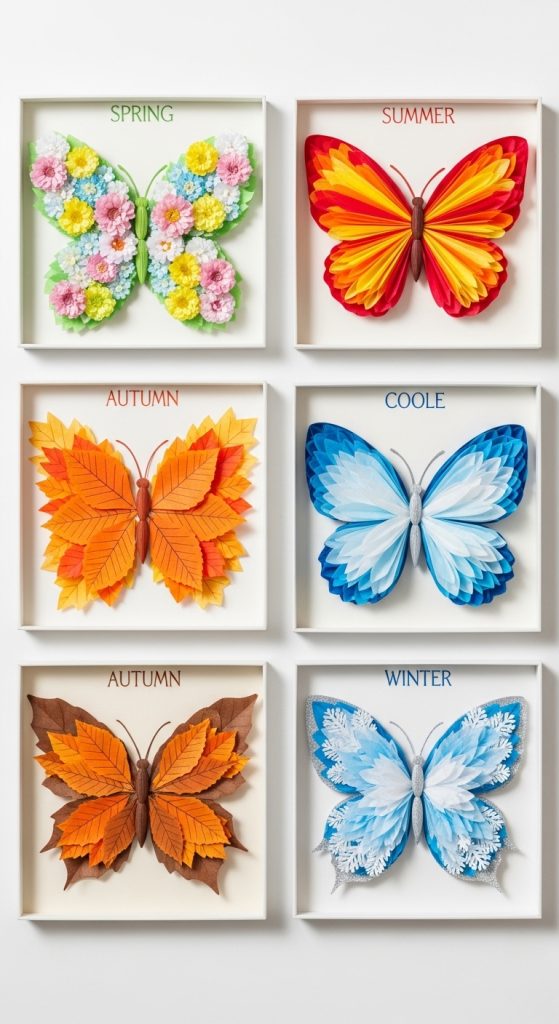
Seasonal theme butterfly art sets focus on creating designs inspired by different seasons such as spring, summer, autumn, and winter. This concept is widely used in Pinterest ideas because it allows continuous creative variation throughout the year. Each season introduces a unique color palette and mood, making the artwork adaptable and dynamic. This style is ideal for home decor updates and educational creative projects. It helps learners understand how color and theme influence visual expression. The butterflies reflect seasonal identity through structured design choices, making them suitable for organized displays. This method also supports creative planning and thematic consistency in DIY tutorial projects.
To create this design, assign specific color palettes to each season. Paint and cut tissue paper butterflies accordingly. Arrange sets separately or combine them into a seasonal timeline display. Secure each piece with consistent spacing. This step-by-step method encourages planning and thematic creativity.
Common Beginner Mistakes and How to Avoid Them
Many beginners in tissue paper painted butterfly art face challenges related to material handling and composition balance. A common mistake is using excessive paint, which causes tissue paper to tear or lose texture. Another issue is inconsistent cutting, leading to uneven butterfly shapes that disrupt visual harmony. Poor planning of color combinations can also result in unbalanced designs that lack aesthetic appeal. Overcrowding butterflies in a single area reduces clarity and weakens the overall composition. To avoid these issues, it is important to apply paint lightly, use templates for consistent shaping, and plan layout before final placement. Maintaining a clean workspace also helps prevent damage to delicate materials. Following structured DIY tutorial steps ensures better control over the creative process. With proper attention to detail, even beginners can achieve visually appealing handmade decoration results that align with modern design expectations.
Practical Tips for Better Results
Improving tissue paper painted butterfly art requires attention to layering, color balance, and material handling. Using diluted paint helps preserve tissue texture while still achieving vibrant color effects. Layering multiple sheets adds depth and enhances visual dimension. Choosing a consistent color palette ensures harmony across the entire design. It is also helpful to test small samples before creating full compositions. Keeping tools organized improves workflow efficiency and reduces mistakes. Light adhesive application prevents wrinkles and maintains clean surfaces. Planning arrangement before final placement supports balanced composition. These practical approaches enhance DIY tutorial outcomes and make creative projects more structured and visually appealing. Applying these techniques consistently results in refined handmade decoration suitable for home decor and Pinterest ideas inspiration.
Styling, Presentation, or Organization Ideas
Styling tissue paper painted butterfly art depends on arrangement, spacing, and thematic consistency. Vertical wall arrangements create a flowing visual effect, while clustered layouts produce focal points. Using neutral backgrounds enhances contrast and highlights butterfly details. Grouping butterflies by color or size adds visual structure. Incorporating symmetrical patterns supports minimalist style aesthetics. Displaying butterflies in frames or panels creates organized home decor elements. Floating arrangements add movement and dynamic presentation. Maintaining consistent spacing ensures clarity and balance. These presentation methods align with modern design principles and support creative organization. They also enhance DIY tutorial results by transforming simple materials into visually structured artistic displays suitable for inspiration-driven environments.
Budget or Time Planning
Tissue paper painted butterfly art is an efficient and budget-friendly creative project suitable for beginners. Materials are inexpensive and widely available, making it ideal for budget ideas in DIY crafting. Most projects can be completed within a few hours depending on complexity and quantity. Simple designs require minimal preparation time, while layered or mixed media compositions may take longer due to drying and assembly stages. Planning ahead helps reduce delays and ensures smoother execution. Organizing materials before starting improves efficiency and prevents interruptions. Batch processing butterflies can save time when creating multiple pieces. This structured approach makes it suitable for educational environments, home decor projects, and creative workshops. Efficient planning enhances productivity while maintaining artistic quality in beginner friendly DIY tutorial activities.
Creative Expansion and Advanced Inspiration
Advanced tissue paper painted butterfly art explores more complex layering, structural design, and mixed material integration. Techniques such as 3D sculpting, shadow layering, and multi-surface installation can elevate basic designs into professional-level artwork. Combining butterflies with abstract backgrounds enhances visual storytelling. Incorporating lighting effects can create dramatic presentation in home decor settings. Expanding into large-scale wall installations allows for immersive artistic environments. Experimenting with unconventional shapes and asymmetry introduces modern design variation. These creative expansions support long-term skill development and inspire continuous exploration of DIY tutorial techniques. They also align with evolving Pinterest ideas focused on unique, personalized, and visually impactful handmade decoration concepts.