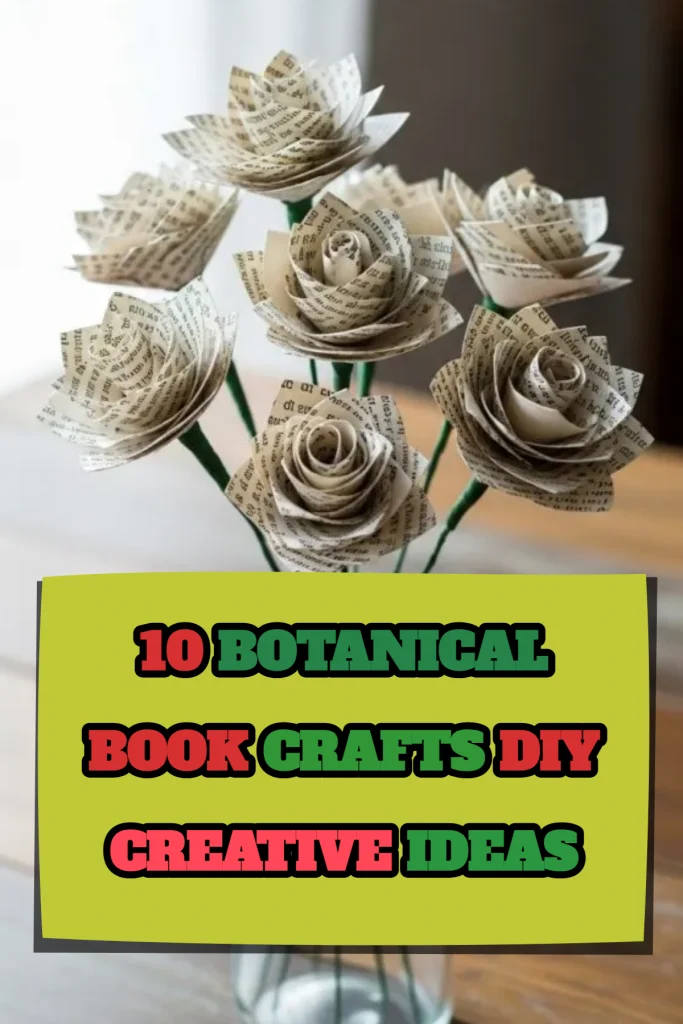
Books are more than just sources of knowledge or stories; they can also be transformed into beautiful and creative crafts. Whether you have old books that are no longer in use or you simply want to repurpose worn-out novels, there are countless ways to give them new life. Book crafts are not only environmentally friendly but also allow you to express your creativity and make unique decorative items for your home. These crafts can be simple for beginners or more complex for experienced crafters. They can also serve as meaningful gifts for friends and family, adding a personal touch to your creations. In this blog post, we will explore ten creative DIY book craft ideas. Each project will include preparation steps, the materials needed, and a clear guide to help you bring your ideas to life. By the end of this guide, you will have plenty of inspiration to turn ordinary books into extraordinary works of art.
1. Folded Book Art
Materials Needed: Old hardcover book, ruler, pencil.
Preparation and Steps:
Folded book art is a creative way to turn the pages of a book into sculptural designs. Start by choosing a hardcover book with at least 200 pages. Decide on a simple word, symbol, or heart shape to fold. Use a ruler and pencil to mark the top and bottom of each fold according to your chosen pattern. Begin folding each page carefully, ensuring precise creases for a clean design. You can find printable templates online that indicate exactly where each fold should go. Once all pages are folded, the book will display a 3D pattern when viewed from the side. This craft doesnโt require glue or cutting, making it safe and easy. Folded book art works well as a decorative piece on a shelf or desk. It also makes a thoughtful handmade gift for book lovers.

2. Book Page Wreath
Materials Needed: Old book, scissors, hot glue gun, cardboard circle, ribbon.
Preparation and Steps:
A book page wreath is a beautiful decorative craft suitable for any season. Begin by cutting a circular base from cardboard to act as your wreath form. Tear or cut pages from an old book into small rectangles or triangles. Roll, fold, or curl these pieces to create texture. Attach each piece to the cardboard base with a hot glue gun, overlapping them to cover the base completely. Continue until the entire base is filled with layered book pages. Attach a ribbon at the top for hanging. You can also add small embellishments such as flowers or beads if desired. This craft transforms old book pages into an elegant piece of home decor. Itโs ideal for placing on walls, doors, or even as a centerpiece for special occasions.

3. Book Page Flowers
Materials Needed: Old book, scissors, floral wire, glue, pencil.
Preparation and Steps:
Book page flowers are delicate and make excellent decorative items. Start by selecting pages from an old book. Draw simple petal shapes on the pages and cut them out carefully. You will need several petals for each flower. Use a pencil or floral wire to curl and shape the petals for a more realistic look. Assemble the petals around a small rolled paper or floral wire stem, securing them with glue. You can make various flower types by adjusting the petal shapes and sizes. Book page flowers are perfect for arranging in vases, creating garlands, or embellishing gifts. They offer a lasting alternative to fresh flowers and allow you to reuse old books creatively.

4. Book Page Garland
Materials Needed: Old books, string, scissors, hole punch, clothespins or glue.
Preparation and Steps:
A book page garland is simple yet charming. Begin by tearing or cutting out rectangular pieces from old book pages. Use a hole punch to make two holes at the top of each piece or fold over the top edge to attach the string with glue or clothespins. Thread the string through the holes or attach the pages sequentially, leaving space between each piece for movement. You can also shape the pages into hearts, stars, or triangles for extra creativity. Once complete, hang your garland along walls, windows, or shelves. This craft is ideal for parties, holidays, or adding a literary touch to your room decor. Itโs inexpensive, easy, and fun to make in bulk for larger displays.

5. Book Page Lampshade
Materials Needed: Old book pages, glue, scissors, plain lampshade, mod podge, brush.
Preparation and Steps:
Transform a plain lampshade using old book pages for a cozy, literary-inspired look. Start by cutting the book pages into uniform rectangles that fit your lampshade surface. Apply a thin layer of mod podge on the lampshade surface and carefully attach the pages, overlapping slightly to cover completely. Smooth each page as you go to avoid wrinkles. Once all pages are glued, apply another coat of mod podge to seal the pages and create a durable finish. Allow the lampshade to dry completely before placing it on the lamp base. When lit, the pages create a warm, inviting glow. This craft not only recycles old books but also adds a unique decorative element to your home.

6. Secret Hollow Book Storage
Materials Needed: Thick hardcover book, ruler, craft knife, cutting mat, glue.
Preparation and Steps:
A secret hollow book is a clever way to store small items discreetly. Choose a hardcover book that you no longer need. Use a ruler to measure and mark a rectangle on the pages, leaving at least a one-inch border on all sides. Carefully cut out the marked area using a craft knife on a cutting mat, removing a few pages at a time. Once you reach the desired depth, apply glue to the inner edges to secure the hollowed space. Press and let it dry completely. The result is a hidden compartment that looks like a normal book on a shelf. You can use it to store jewelry, money, or other small valuables. This project combines functionality and creativity.

7. Book Page Wall Art
Materials Needed: Old books, canvas or cardboard, glue, frame (optional), scissors.
Preparation and Steps:
Book page wall art is a simple yet elegant way to decorate a space. Start by choosing a canvas or piece of cardboard as your base. Tear or cut out letters, words, or images from old book pages. Arrange the pieces on the canvas in your desired pattern. Once satisfied with the layout, glue each piece carefully. You can layer pages for texture or create a collage effect with various colors and fonts. Optionally, frame your creation to protect it and make it ready to hang. This craft allows you to display meaningful quotes, favorite book passages, or abstract designs in a creative format. Itโs perfect for living rooms, bedrooms, or offices.

8. Book Page Gift Tags
Materials Needed: Old book pages, scissors, hole punch, string or ribbon, markers.
Preparation and Steps:
Book page gift tags are quick and easy to make. Cut book pages into small rectangles or shapes like circles, hearts, or stars. Punch a hole at the top of each tag. Thread string or ribbon through the hole for attachment to gifts. You can write names, messages, or decorate the tags with stamps or markers. These tags give a personalized and vintage touch to presents. Theyโre also a great way to reuse pages from old books that are no longer in use. This craft is perfect for birthdays, holidays, or any special occasion where a unique gift presentation is desired.

9. Book Page Coasters
Materials Needed: Old book pages, cork or cardboard coasters, mod podge, brush, scissors.
Preparation and Steps:
Transform old book pages into functional coasters. Start by cutting book pages to match the size of your coasters. Apply a thin layer of mod podge on the coaster surface and attach the book page. Smooth out bubbles and wrinkles. Apply another layer of mod podge on top to seal and protect the paper. Let it dry completely. Book page coasters make practical and decorative additions to any coffee table. You can also create themed sets using quotes or illustrations from your favorite books. They are inexpensive to make and perfect as handmade gifts for friends and family.

10. Book Page Envelopes
Materials Needed: Old book pages, scissors, glue, ruler, pencil.
Preparation and Steps:
Book page envelopes are charming and unique for letters or small items. Begin by selecting pages from an old book. Use a ruler to measure and mark the desired envelope size. Cut the page according to the measurements. Fold the page into an envelope shape, leaving one side open for inserting items. Secure the sides with glue. Optionally, decorate with stamps, stickers, or calligraphy. Book page envelopes are ideal for sending notes, gift cards, or invitations. They are simple to make and add a literary-inspired touch to any correspondence.