Neutral beach nails are a timeless nail style inspired by soft coastal tones, sandy textures, and calm ocean-inspired aesthetics. This Pinterest-focused trend blends minimalist style with natural color palettes, making it suitable for everyday wear, vacations, and seasonal transitions. The concept revolves around using muted shades such as beige, soft white, taupe, sand, and pale pink, combined with subtle design elements that reflect beach environments. Unlike bold or highly detailed nail art, neutral beach nails focus on simplicity, elegance, and soft visual harmony.
This article explores how to create different variations of neutral beach nails using practical methods and beginner friendly techniques. Each idea is designed as a creative project that can be achieved at home with basic materials and simple tools. Whether you prefer a clean minimalist design or a slightly textured aesthetic inspired by seashells and ocean foam, these ideas provide structured inspiration. You will learn how to combine color theory, nail shaping, and subtle decoration techniques to achieve a polished, modern design suitable for everyday and seasonal looks.
Why This Idea Is Trending or Useful
Neutral beach nails have become highly popular on Pinterest due to their versatility and calming aesthetic appeal. They align with modern design trends that prioritize minimalism, soft color palettes, and natural inspiration. This nail style works across different age groups and complements various outfits, making it a practical choice for both casual and formal settings. The beach-inspired theme adds a seasonal touch without relying on overly complex designs, which makes it accessible for beginners.
Another reason for its popularity is the rise of DIY beauty culture. Many people now prefer simple at-home nail tutorials that require minimal tools and materials. Neutral beach nails fit perfectly into this trend because they rely on basic shades and easy application techniques. They also reflect a broader lifestyle movement toward relaxation, nature-inspired aesthetics, and mindful self-care. This combination of creativity and simplicity is what makes neutral beach nails a consistent Pinterest favorite and a recurring source of inspiration in home decor and personal styling boards.
Materials and Preparation
Creating neutral beach nails requires a small set of basic materials that are easy to find and suitable for beginner friendly application. Essential items include a base coat, neutral nail polishes such as beige, soft white, and light brown tones, and a top coat for sealing the design. Additional decorative elements may include fine brushes for detailing, nail sponges for gradient effects, and subtle embellishments like fine glitter or matte powder. These materials support a wide range of creative ideas while keeping the process simple and affordable.
Preparation is an important step before starting any nail design. Nails should be cleaned, shaped, and buffed to ensure a smooth surface. Choosing a consistent nail shape such as oval, almond, or soft square helps maintain a cohesive aesthetic. Planning the design beforehand is also useful, especially when combining multiple tones or textures. A clean workspace and organized materials improve efficiency and reduce mistakes during application. This preparation stage sets the foundation for achieving a polished, salon-like result at home.
Idea 1: Soft Sand Gradient Nails
How to Create
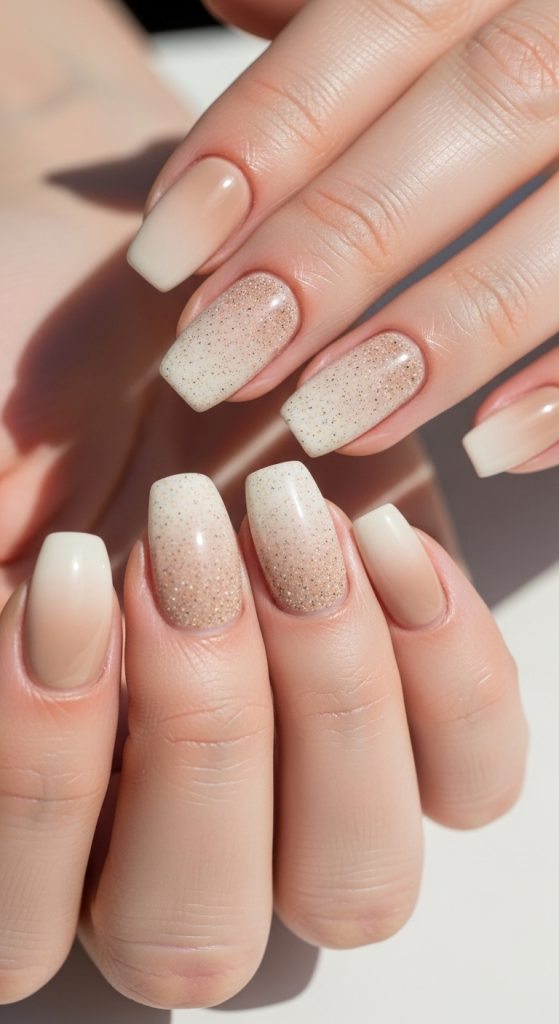
Soft sand gradient nails are inspired by the natural transition of beach sand meeting the shoreline. This design focuses on blending neutral shades such as beige, ivory, and light taupe to create a smooth fading effect. The goal is to achieve a soft visual transition that resembles the calm layering of sand under natural sunlight. This style fits perfectly into Pinterest ideas that emphasize minimalism and natural aesthetics. The gradient effect adds depth without overwhelming the overall look, making it suitable for everyday wear and seasonal inspiration. It works well with both short and long nail shapes, especially almond and oval styles, which enhance the softness of the design.
To create this look, start with a base coat to protect the nails. Apply the lightest neutral shade as the foundation. Once dry, use a makeup sponge to gently blend a slightly darker shade from the tip toward the middle of the nail. Repeat the process with a third shade if desired to increase depth. Light tapping motions help create a seamless gradient. Finish with a glossy or matte top coat depending on preference. This step by step process is beginner friendly and requires minimal tools, making it an easy project for anyone interested in creative nail design.
Execution Process
The execution of soft sand gradient nails requires patience and controlled layering to achieve a natural finish. The key is to work in thin coats rather than heavy layers, as this allows smoother blending between colors. Each layer should be allowed to partially dry before applying the next to avoid uneven patches. Using a sponge technique helps distribute color evenly while maintaining a soft transition effect. This method is widely used in DIY nail tutorials because it does not require advanced artistic skills.
After achieving the desired gradient, refining the edges is important. A small brush dipped in nail polish remover can clean excess polish around the nail bed for a professional finish. Sealing the design with a top coat enhances durability and adds shine or matte texture depending on the chosen style. This nail idea is ideal for those who prefer minimalist style with subtle detail, making it a strong example of modern neutral beach nails.
Idea 2: Seashell Accent Neutral Nails
How to Create
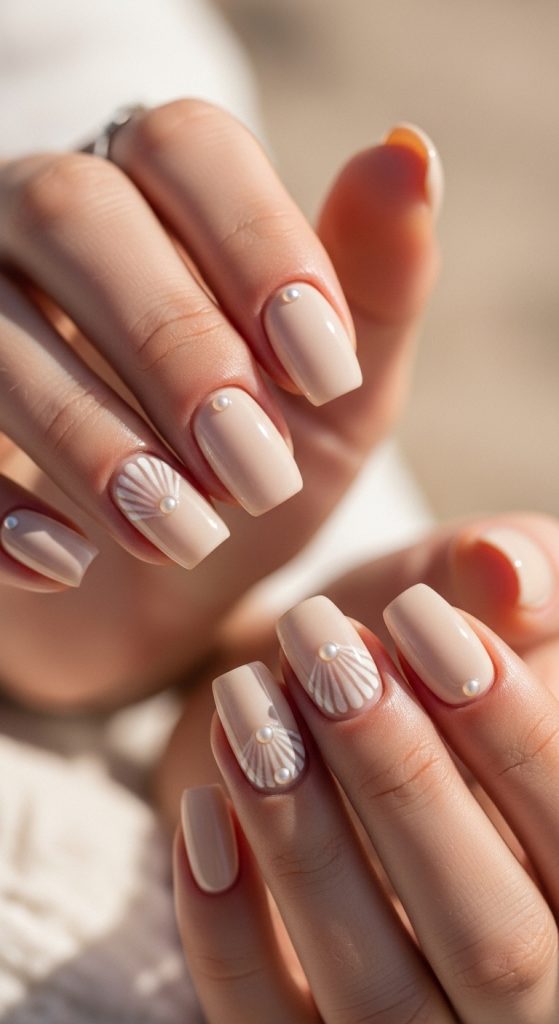
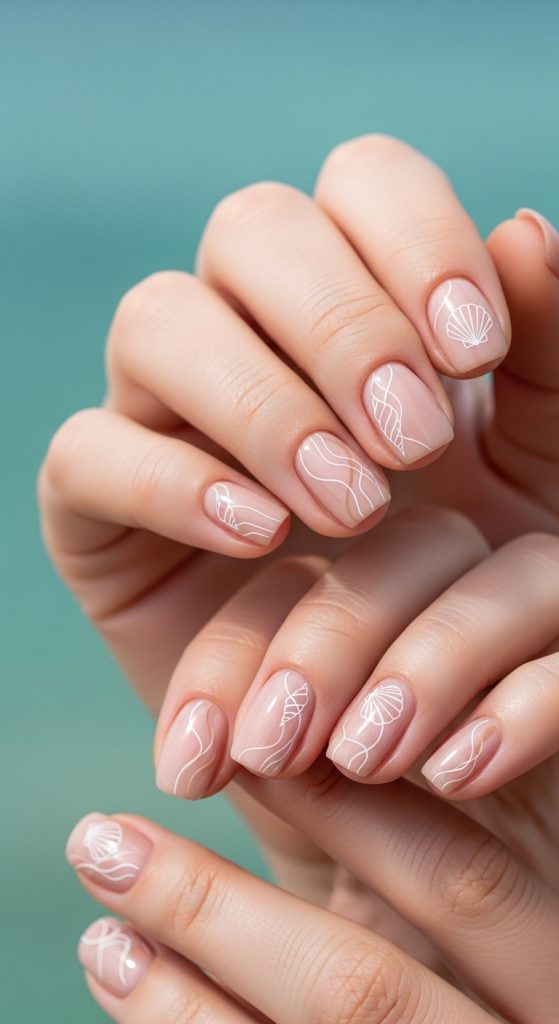
Seashell accent neutral nails bring a delicate coastal touch to a soft neutral base. This design uses beige or pale pink as the primary color while incorporating subtle shell-inspired details on one or two accent nails. The concept is inspired by natural seashell textures found along beaches, translating them into simple nail art that remains elegant and minimal. It is one of the most popular Pinterest ideas for beach-themed nail inspiration because it balances creativity with subtlety. The design works especially well for those who prefer understated decoration rather than bold patterns.
To create this look, apply a neutral base color across all nails and allow it to dry completely. For accent nails, use a fine brush or stamping tool to create shell-like curves using a slightly lighter or pearly shade. Optional small embellishments such as tiny pearl accents can be added for texture. The process does not require advanced tools, making it beginner friendly. A protective top coat ensures the design stays intact while enhancing the soft coastal effect.
Execution Process
The execution process focuses on precision and controlled detailing. Accent nails should be planned carefully to avoid overcrowding the design. Keeping most nails plain ensures the seashell details remain the focal point. Light hand movements are important when drawing shell patterns, as smooth curved lines mimic natural shell structures more effectively than rigid shapes. This method aligns with DIY nail art tutorials that emphasize simplicity and natural inspiration.
After completing the design, curing or drying time should be respected to prevent smudging. A matte top coat can enhance the organic look, while a glossy finish adds a polished aesthetic. This idea works well for both short-term styling and special occasions, offering a versatile approach to neutral beach nails.
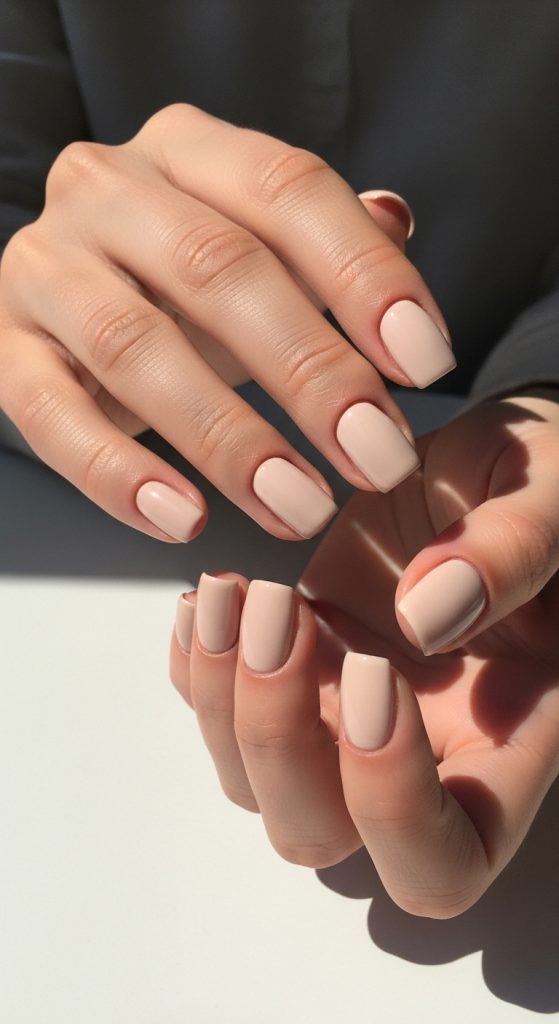
Idea 3: Matte Beige Coastal Nails
How to Create
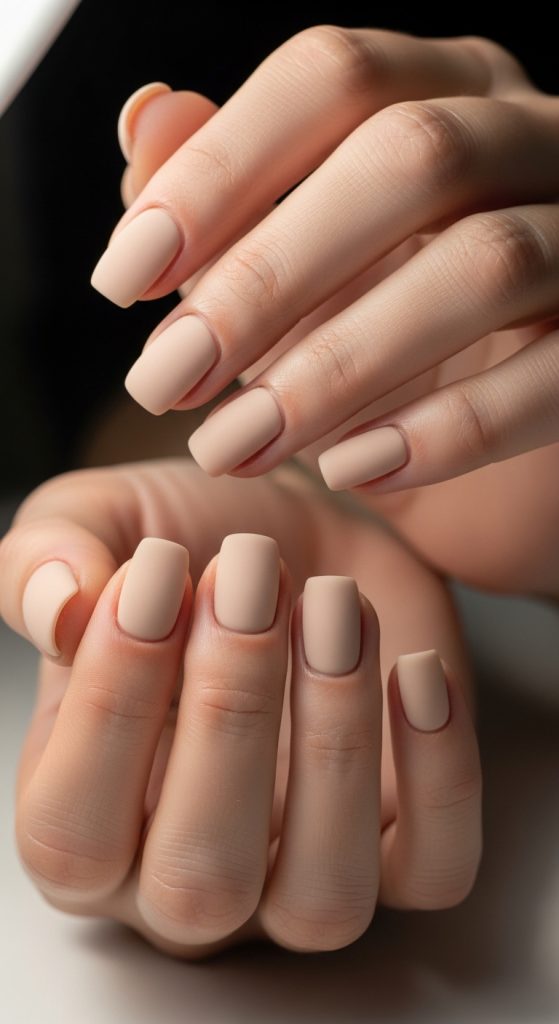
Matte beige coastal nails focus on a soft, velvety finish inspired by warm beach tones. This design uses a single or layered neutral palette dominated by beige shades, creating a calm and cohesive appearance. The matte effect removes shine and adds a modern minimalist style that aligns with current Pinterest ideas. It is particularly suitable for those who prefer simple yet sophisticated nail designs that can match any outfit or occasion.
To create this look, begin with a base coat followed by two layers of beige nail polish. Ensure even application for a smooth surface. Once dry, apply a matte top coat to transform the glossy finish into a soft, non-reflective texture. This step is essential for achieving the signature matte beach aesthetic. The process is simple and requires minimal materials, making it ideal for beginners exploring DIY nail art.
Execution Process
The execution process emphasizes uniform application and surface smoothness. Any uneven polish layers will be more visible under a matte finish, so careful application is important. Light sanding with a buffer before applying the top coat can improve texture. Maintaining clean edges enhances the minimalist appeal of the design.
Once completed, matte beige coastal nails offer a refined and natural appearance suitable for daily wear. The simplicity of the design makes it one of the most practical neutral beach nails ideas for those seeking effortless style.
Idea 4: Ocean Foam White Tip Nails
How to Create
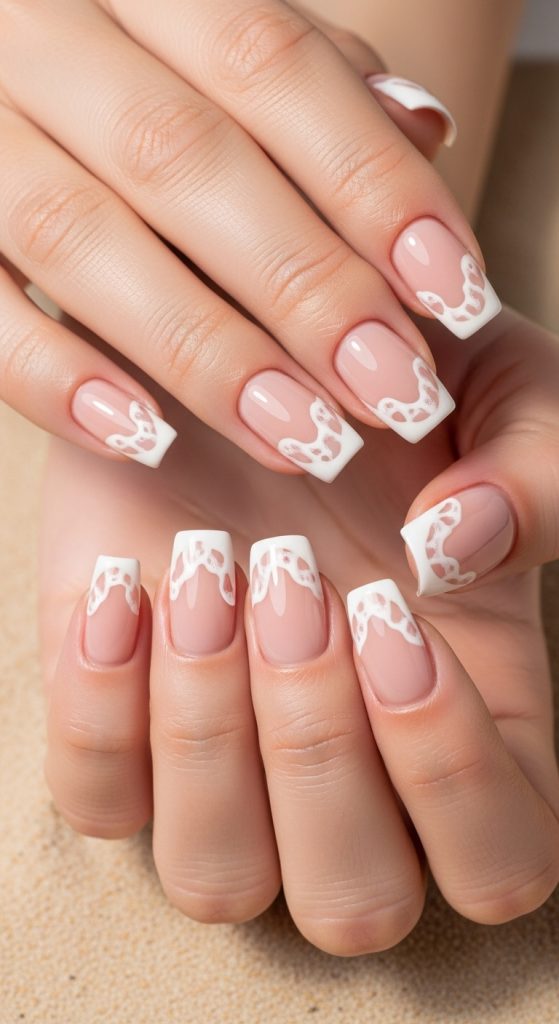
Ocean foam white tip nails are inspired by the gentle movement of sea foam along the shoreline. This design combines a neutral base with soft white tips that resemble natural wave patterns. It is a modern variation of classic French nails, adapted for beach-themed inspiration. The soft contrast between nude and white creates a clean and refreshing aesthetic that fits perfectly into Pinterest ideas focused on minimal design.
To create this style, apply a neutral base coat such as light beige or soft pink. Once dry, use a fine brush or guide tape to paint soft white tips. Instead of a sharp line, the edge should be slightly irregular to mimic natural foam movement. This subtle variation adds a more organic feel to the design. A glossy top coat enhances the smooth transition between colors and completes the look.
Execution Process
The execution process requires attention to detail in shaping the tip line. Unlike traditional French nails, this design avoids strict symmetry and instead focuses on natural flow. Light, curved strokes create a more realistic ocean-inspired effect. It is important to maintain balance between softness and structure.
Once finished, the design provides a fresh and versatile nail style suitable for both casual and formal settings. It is a strong example of how simple changes can transform classic nail designs into creative beach-inspired aesthetics.
Idea 5: Minimal Shell Line Art Nails
How to Create
Minimal shell line art nails focus on fine detailing that represents abstract shell shapes using thin lines. This design uses a neutral base color to highlight delicate white or beige line work. It reflects a modern minimalist style that is highly popular in Pinterest ideas due to its clean and artistic appearance. The design is subtle yet expressive, making it suitable for those who prefer understated creativity.
To create this look, apply a neutral base coat and allow it to dry fully. Using a fine detailing brush, draw simple curved or fan-like lines on one or two nails. These lines should represent abstract shell structures without being overly detailed. The simplicity of the design is what makes it visually appealing. A clear top coat protects the artwork and enhances durability.
Execution Process
The execution process requires steady hand control and minimal pressure when drawing lines. Practicing simple strokes beforehand can improve accuracy. Keeping the design minimal ensures it remains elegant and not overly complex.
Once completed, minimal shell line art nails offer a refined coastal aesthetic that fits well with modern neutral beach nails trends and DIY nail inspiration boards.
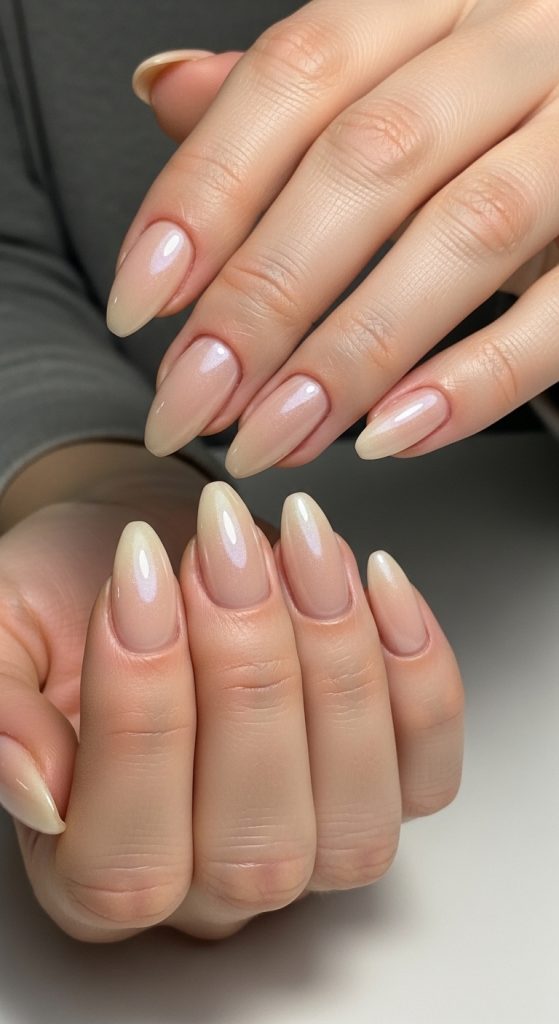
Idea 6: Soft Pearl Shine Nails
How to Create
Soft pearl shine nails are inspired by the natural luster of pearls found in coastal environments. This design uses neutral tones enhanced with a subtle pearlescent finish. It creates a glowing yet understated effect that reflects light gently, making it ideal for elegant and minimalist nail styles.
To create this look, apply a neutral base color followed by a pearl-effect top coat or fine shimmer layer. The key is to maintain subtlety rather than strong glitter. This ensures the nails retain a natural and soft appearance. The process is simple and suitable for beginners exploring creative nail ideas.
Execution Process
The execution process focuses on even shimmer distribution. Applying thin layers prevents clumping and maintains a smooth finish. The final look should appear soft and luminous rather than bold.
This design works well for special occasions and everyday wear, offering a versatile and timeless beach-inspired nail style.
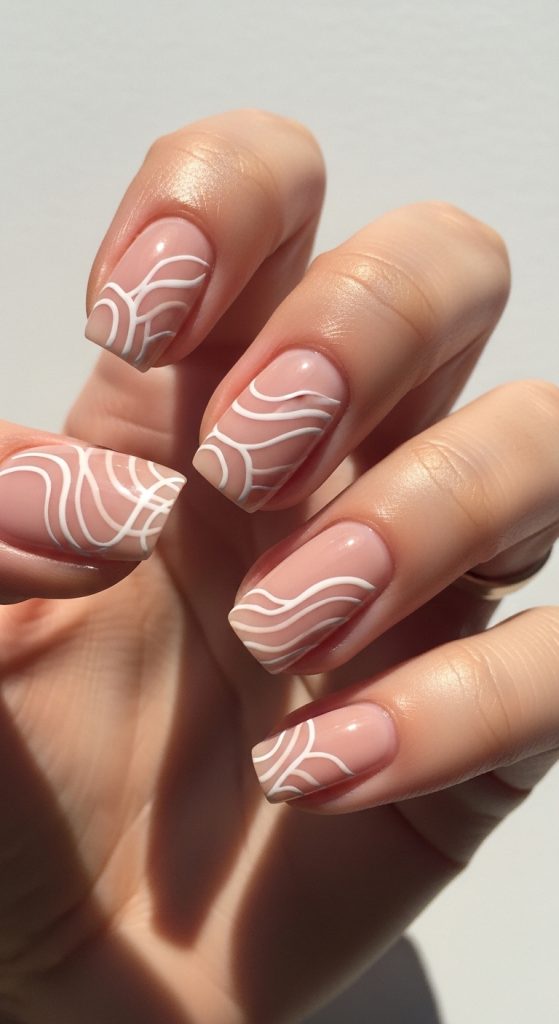
Idea 7: Nude Wave Line Nails
How to Create
Nude wave line nails are inspired by the flowing motion of ocean waves. This design uses neutral shades combined with soft curved lines to create movement across the nail surface. It is a creative yet minimalist approach to beach-themed nail art.
Apply a nude base coat and use a fine brush to draw wave-like curves in white or light beige. The lines should flow naturally across the nail without strict symmetry. This creates a dynamic yet soft visual effect.
Execution Process
The execution process involves layering thin wave patterns gradually. Keeping the design light prevents visual clutter. A glossy top coat enhances flow and depth.
This idea is perfect for those seeking creative project inspiration with a calm aesthetic.
Idea 8: Beige Chrome Beach Nails
How to Create
Beige chrome beach nails combine metallic shine with neutral tones. This design reflects sunlight like sand under bright conditions. It adds a modern twist to traditional neutral beach nails.
Apply a beige base coat followed by chrome powder for a reflective finish. Buff gently to achieve smooth shine.
Execution Process
Even application is essential to avoid patchy chrome effects. Sealing with a top coat ensures durability and smooth texture.
This design offers a futuristic yet natural beach-inspired look.
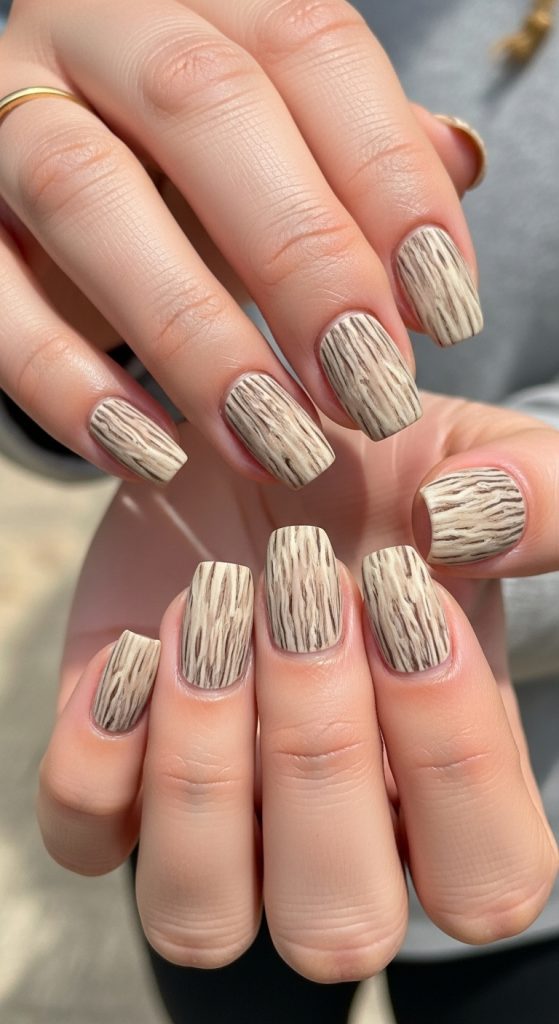
Idea 9: Driftwood Texture Nails
How to Create
Driftwood texture nails mimic natural wood patterns found along beaches. This design uses layered neutral tones to create subtle grain effects.
Apply a base coat and use thin strokes of brown and beige to create texture patterns.
Execution Process
Blending is key to achieving realistic wood-like appearance. Light layering ensures natural depth.
This design is ideal for earthy and minimalist aesthetics.
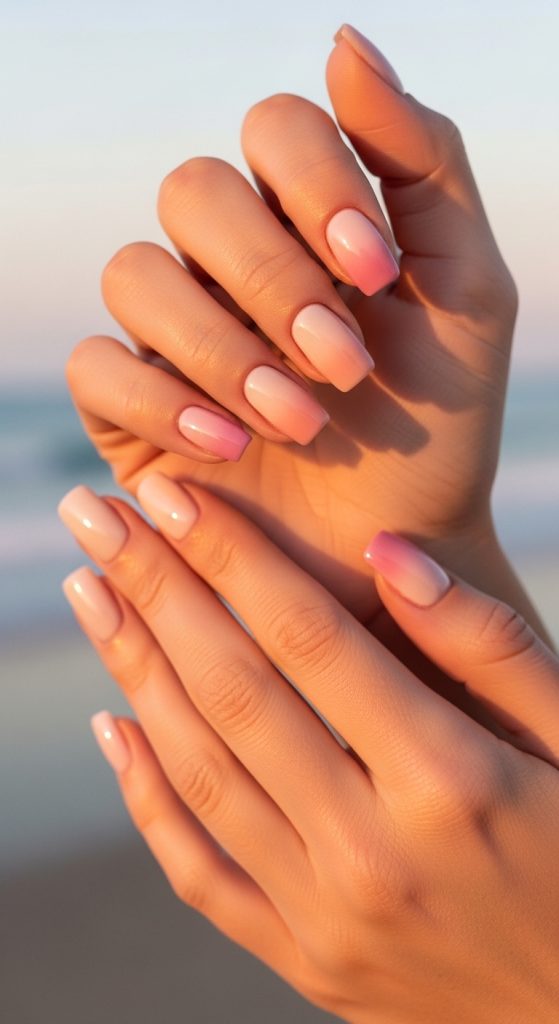
Idea 10: Sunset Sand Blend Nails
How to Create
Sunset sand blend nails combine warm neutral tones inspired by beach sunsets. This design blends soft orange, beige, and pink hues.
Use a sponge technique to blend colors smoothly across the nail.
Execution Process
Gradual blending ensures soft transitions. Finishing with a glossy coat enhances warmth.
This design captures natural coastal beauty in a subtle way.
Common Beginner Mistakes and How to Avoid Them
Many beginners apply thick polish layers, which leads to uneven drying and smudging. Another common mistake is skipping base coat, which affects nail durability. Rushing between layers also reduces design quality. To avoid these issues, always apply thin coats, allow proper drying time, and maintain a clean workspace. Following structured DIY nail tutorial steps improves consistency and results.
Practical Tips for Better Results
Using thin brushes improves control when creating detailed designs. Choosing high-quality neutral shades enhances overall aesthetic appeal. Keeping nails properly shaped ensures design balance. Practicing gradient techniques on paper before applying them to nails can improve precision. These small adjustments significantly improve outcomes in creative nail projects.
Styling, Presentation, or Organization Ideas
Neutral beach nails pair well with soft-toned outfits and minimalist accessories. Keeping hand styling simple enhances nail visibility. Soft lighting improves visual presentation for photos, especially for Pinterest ideas. Organizing nail tools in a clean layout supports efficient DIY work. A consistent aesthetic approach improves overall design harmony.
Budget or Time Planning
Neutral beach nails can be completed at home with minimal cost since they require only basic materials. Most designs take between 30 to 90 minutes depending on complexity. Planning each step in advance reduces errors and saves time. DIY nail projects like these are efficient and accessible for beginners looking for creative inspiration.
Creative Expansion and Advanced Inspiration
Advanced variations can include combining multiple neutral techniques such as chrome blending with line art or adding textured sand effects. Experimenting with layered finishes creates unique modern design outcomes. Future exploration may include seasonal adaptations or combining neutral beach nails with minimalist geometric patterns. These expansions allow continuous creative development while maintaining a cohesive aesthetic direction.